Welcome to
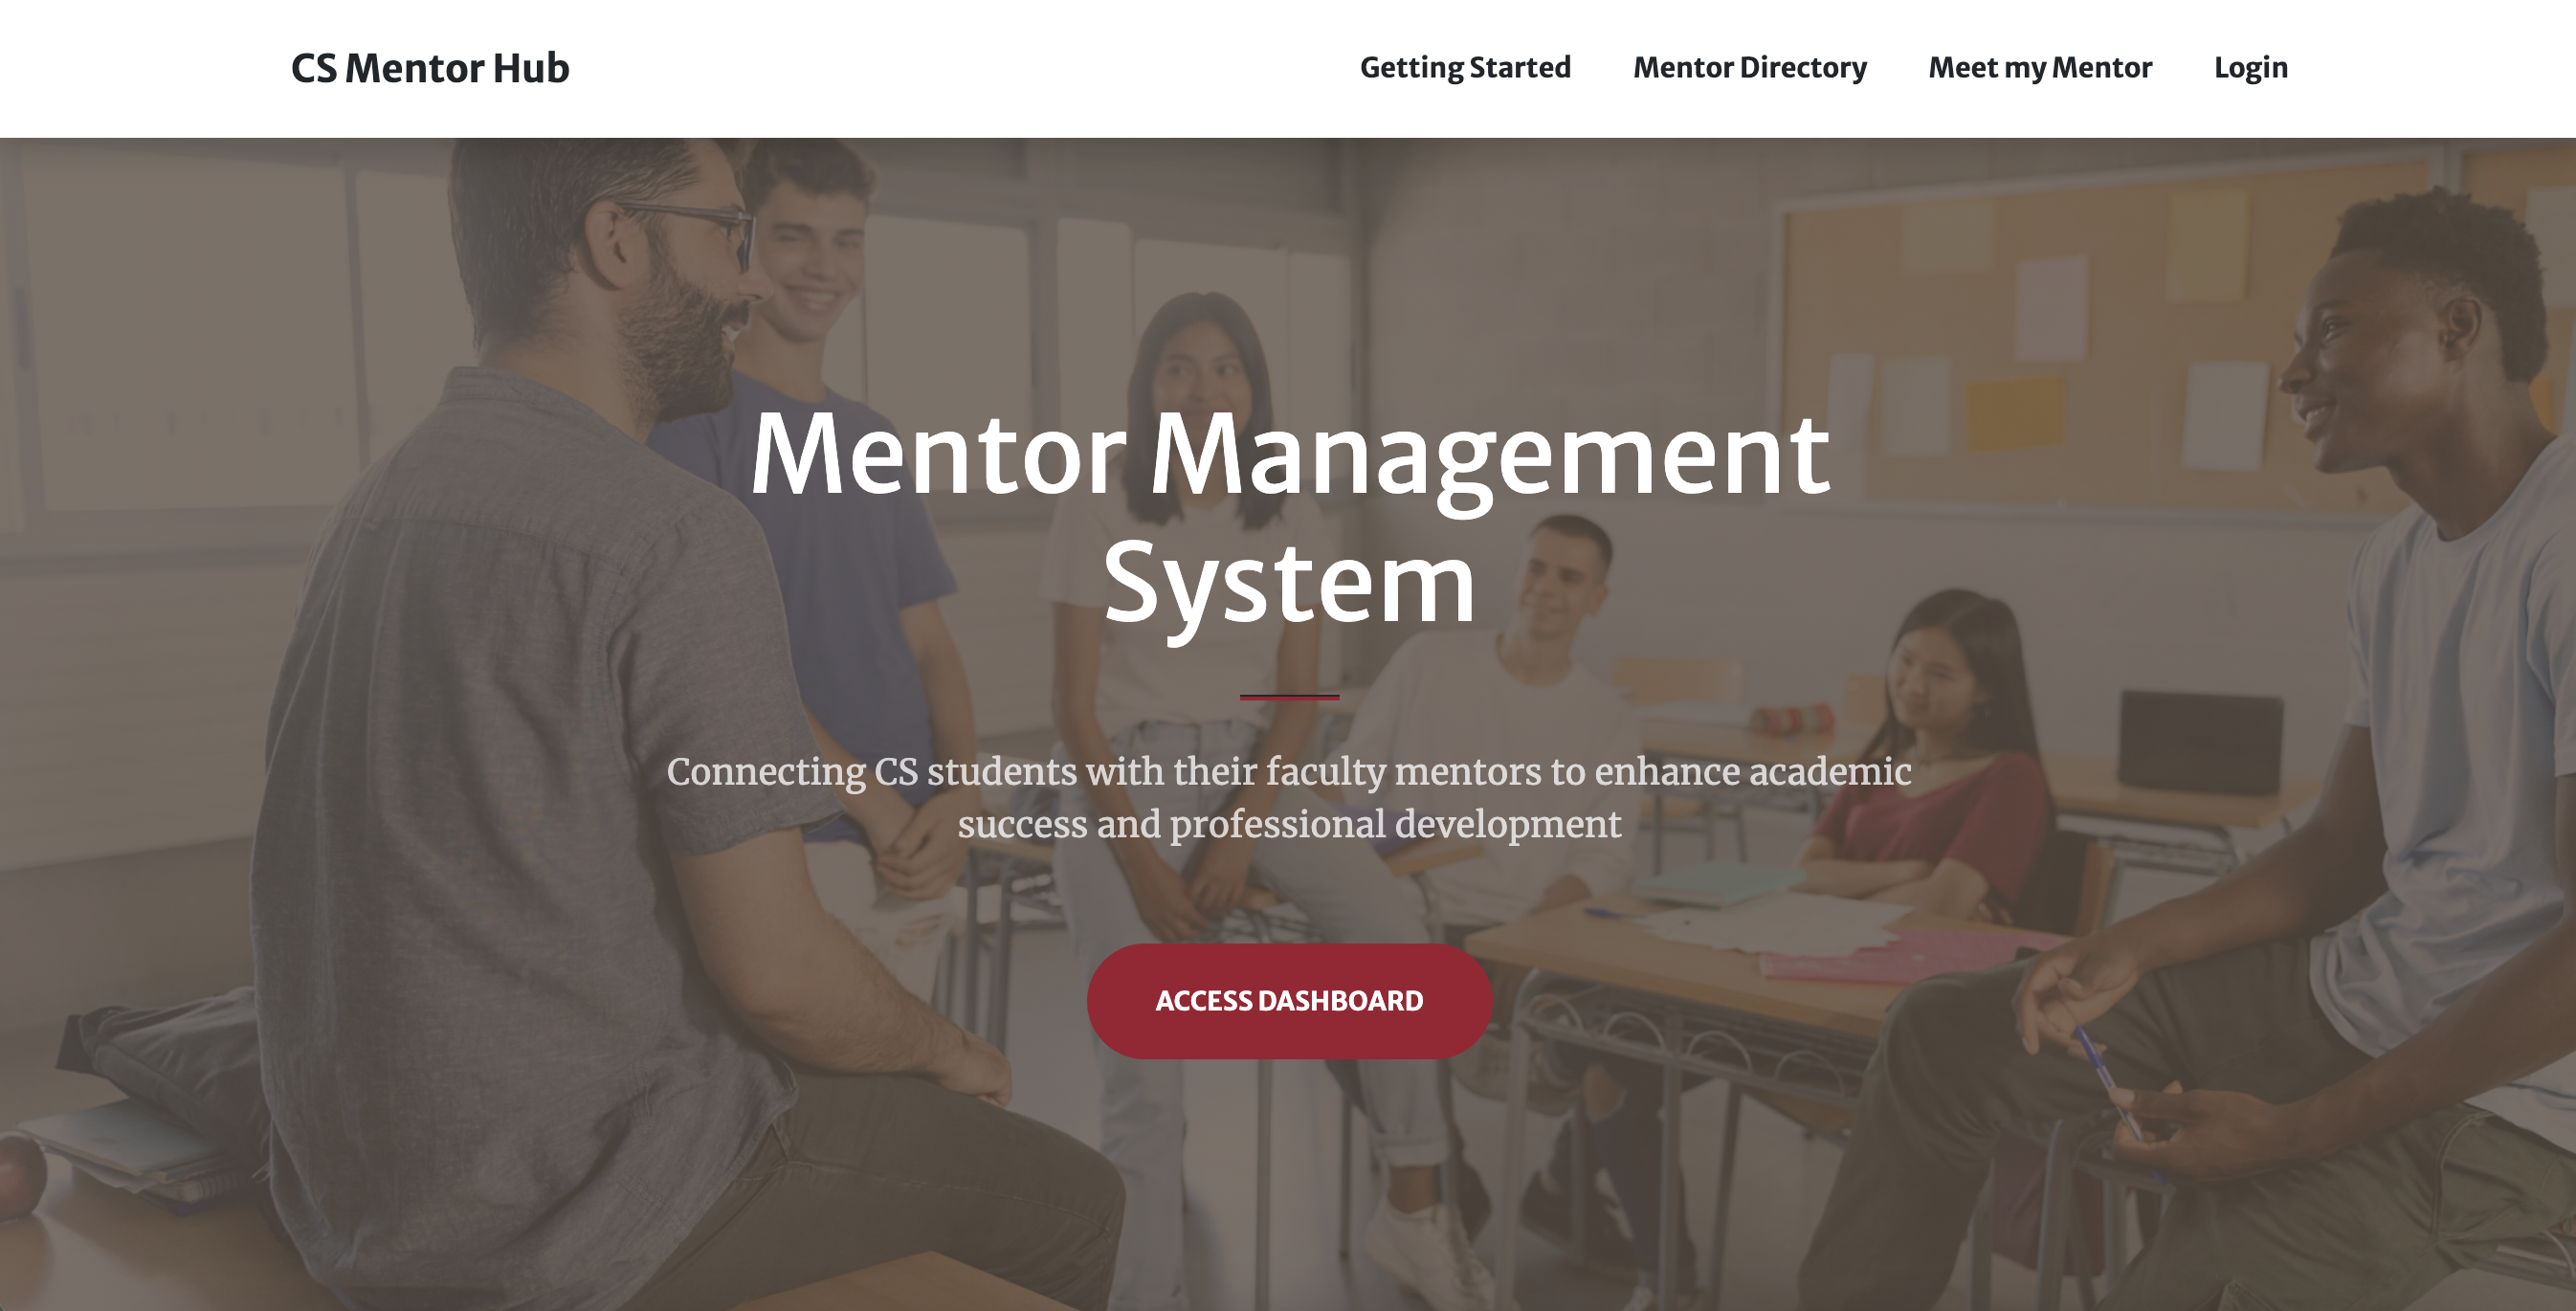
Mentor Management System
our CS 495 Project
About Us Project Deliverables How to Install Application How to Use Application How to Modify Application FAQs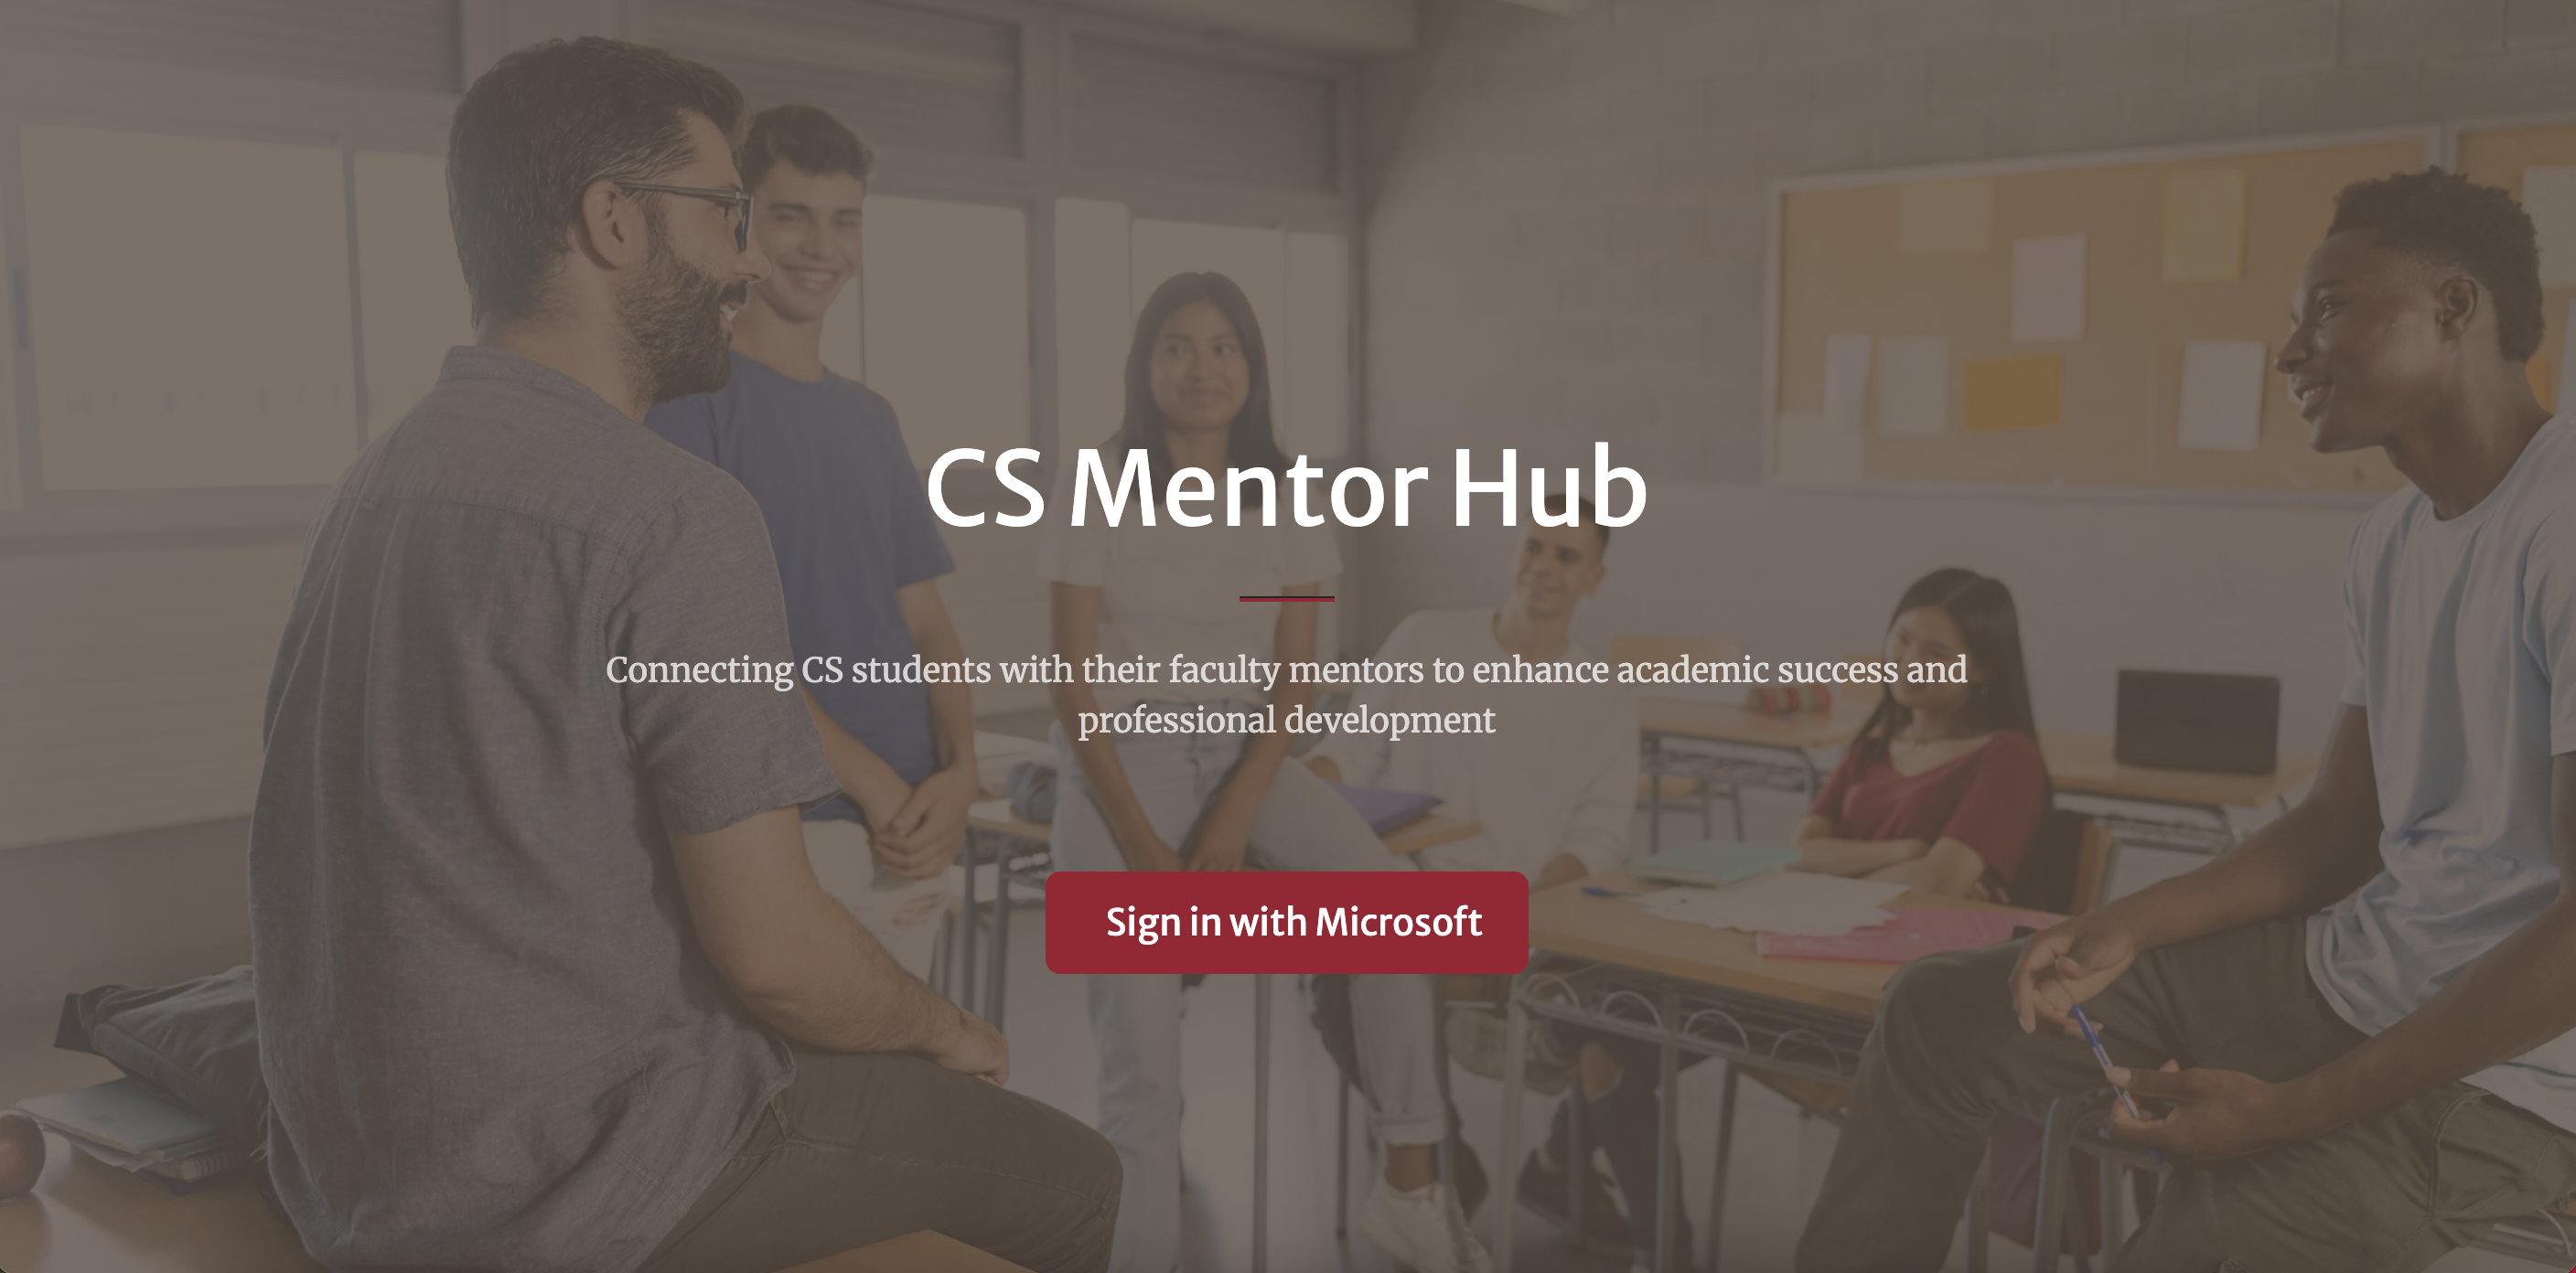
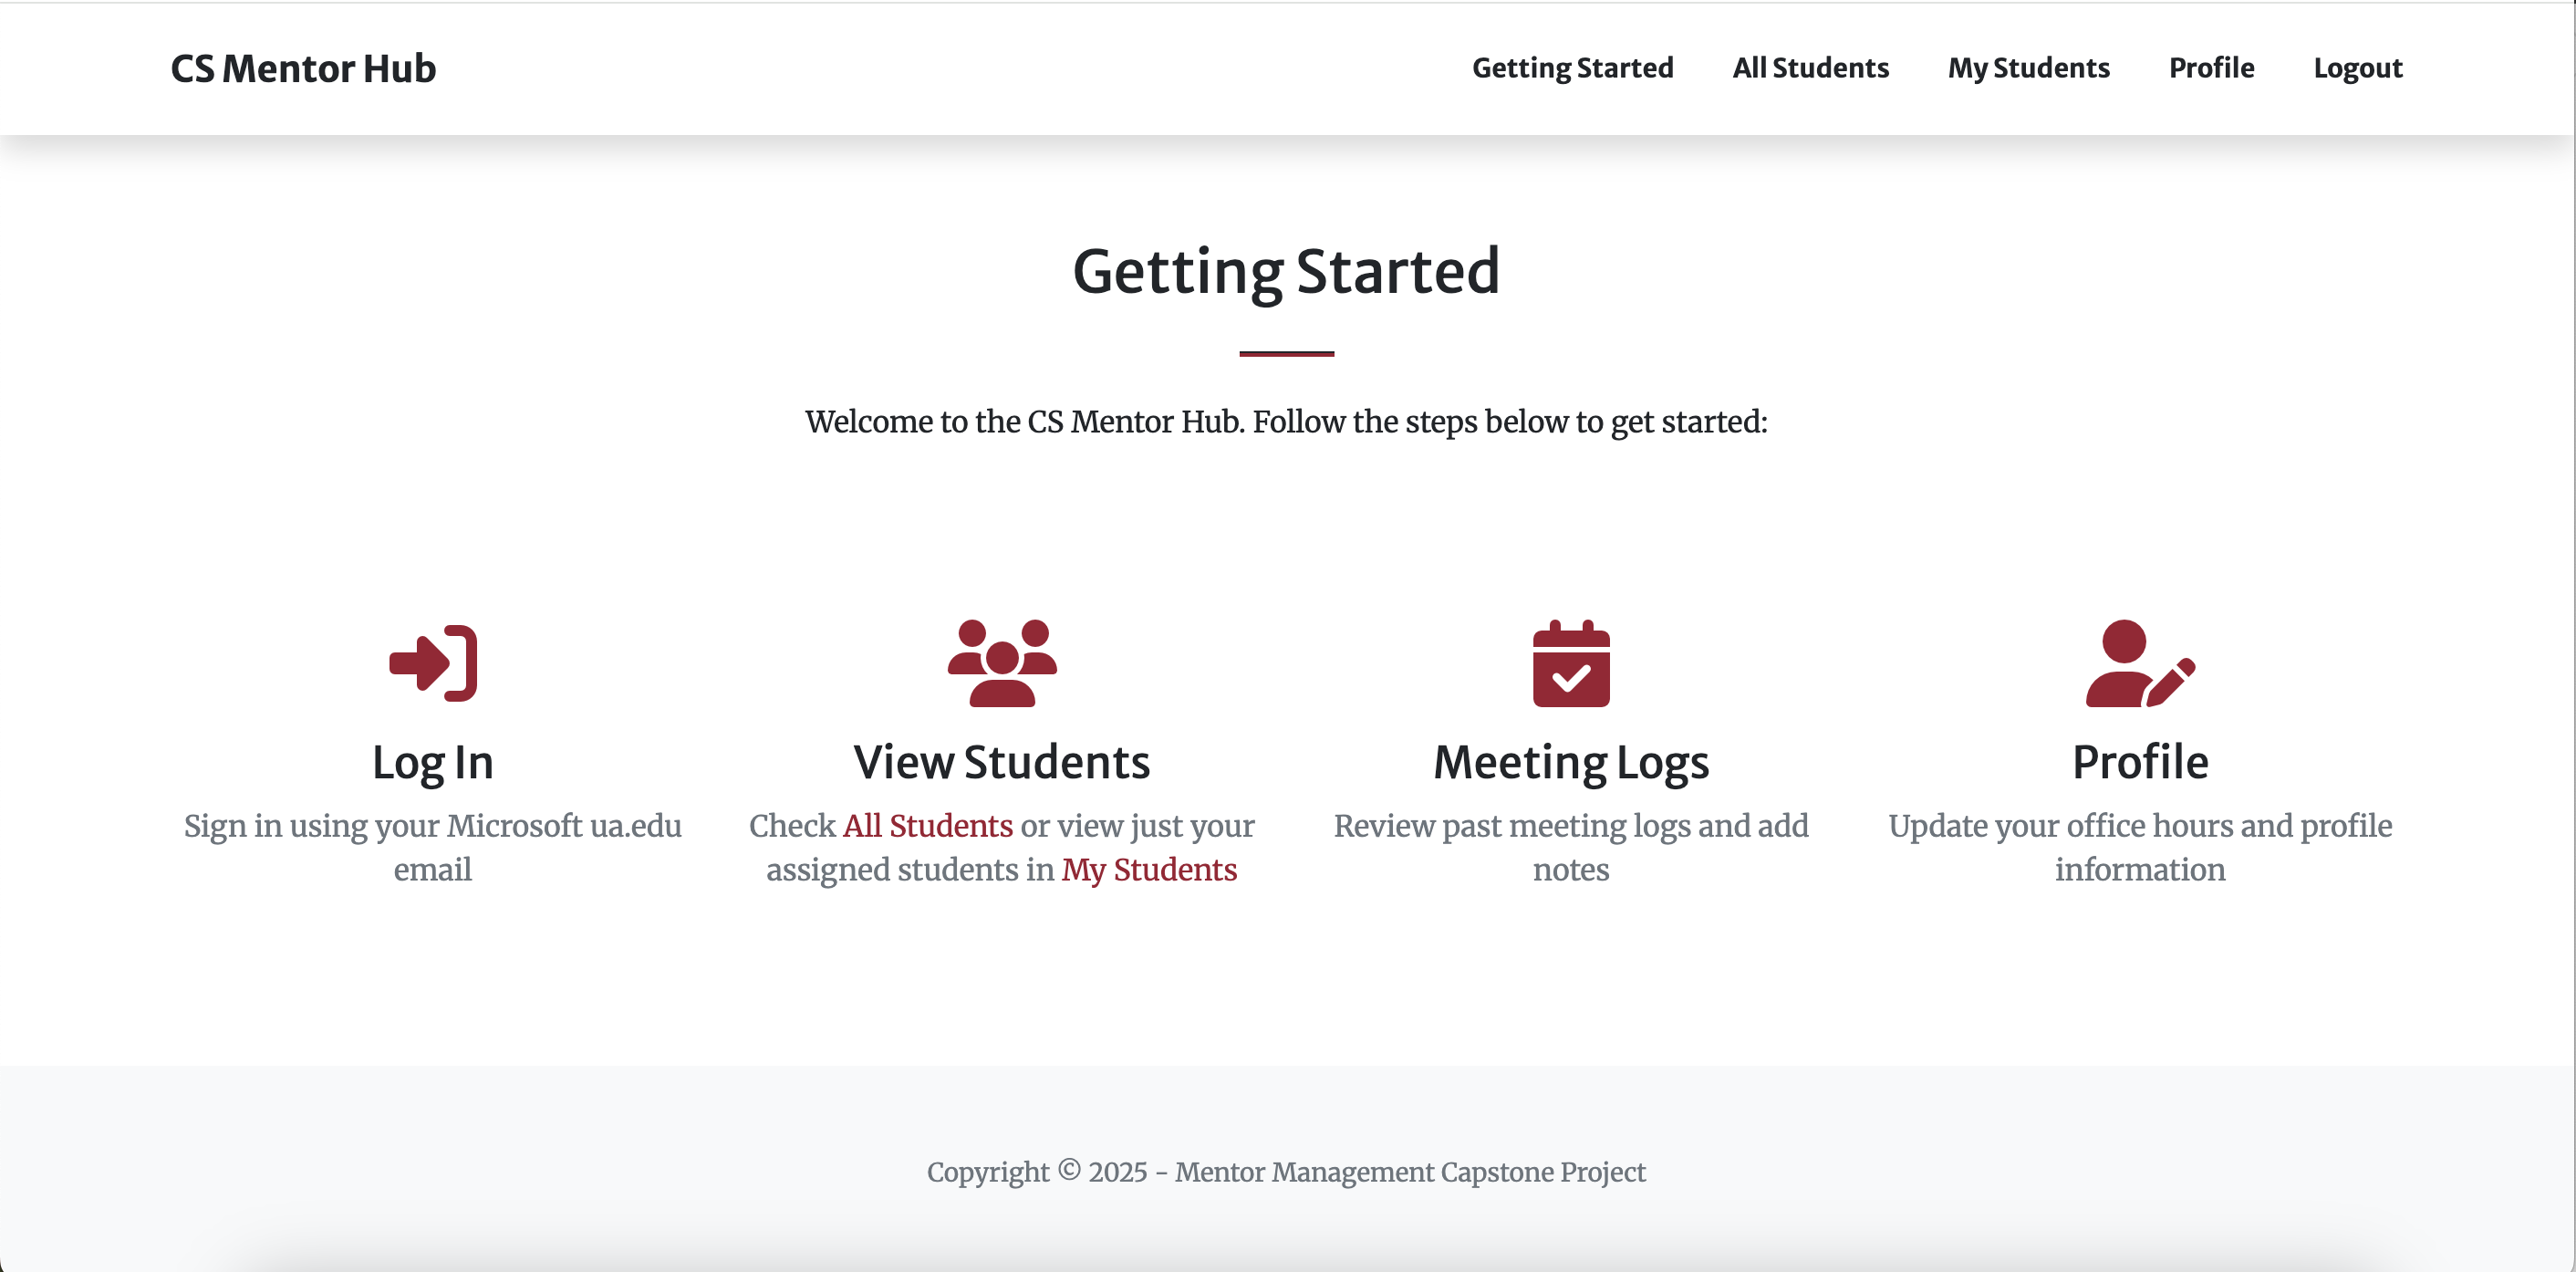
Our Project Goals
We aim to create a project to house a freshman mentorship program at the University of Alabama Computer Science Department
Our project will:
- Allow student mentees to find out who their mentor is
- Allow students to request changes in mentors
- House a database to manage all mentor mentee pairings
- Keep track of all mentor mentee meetings to track a student throughout their time in the University
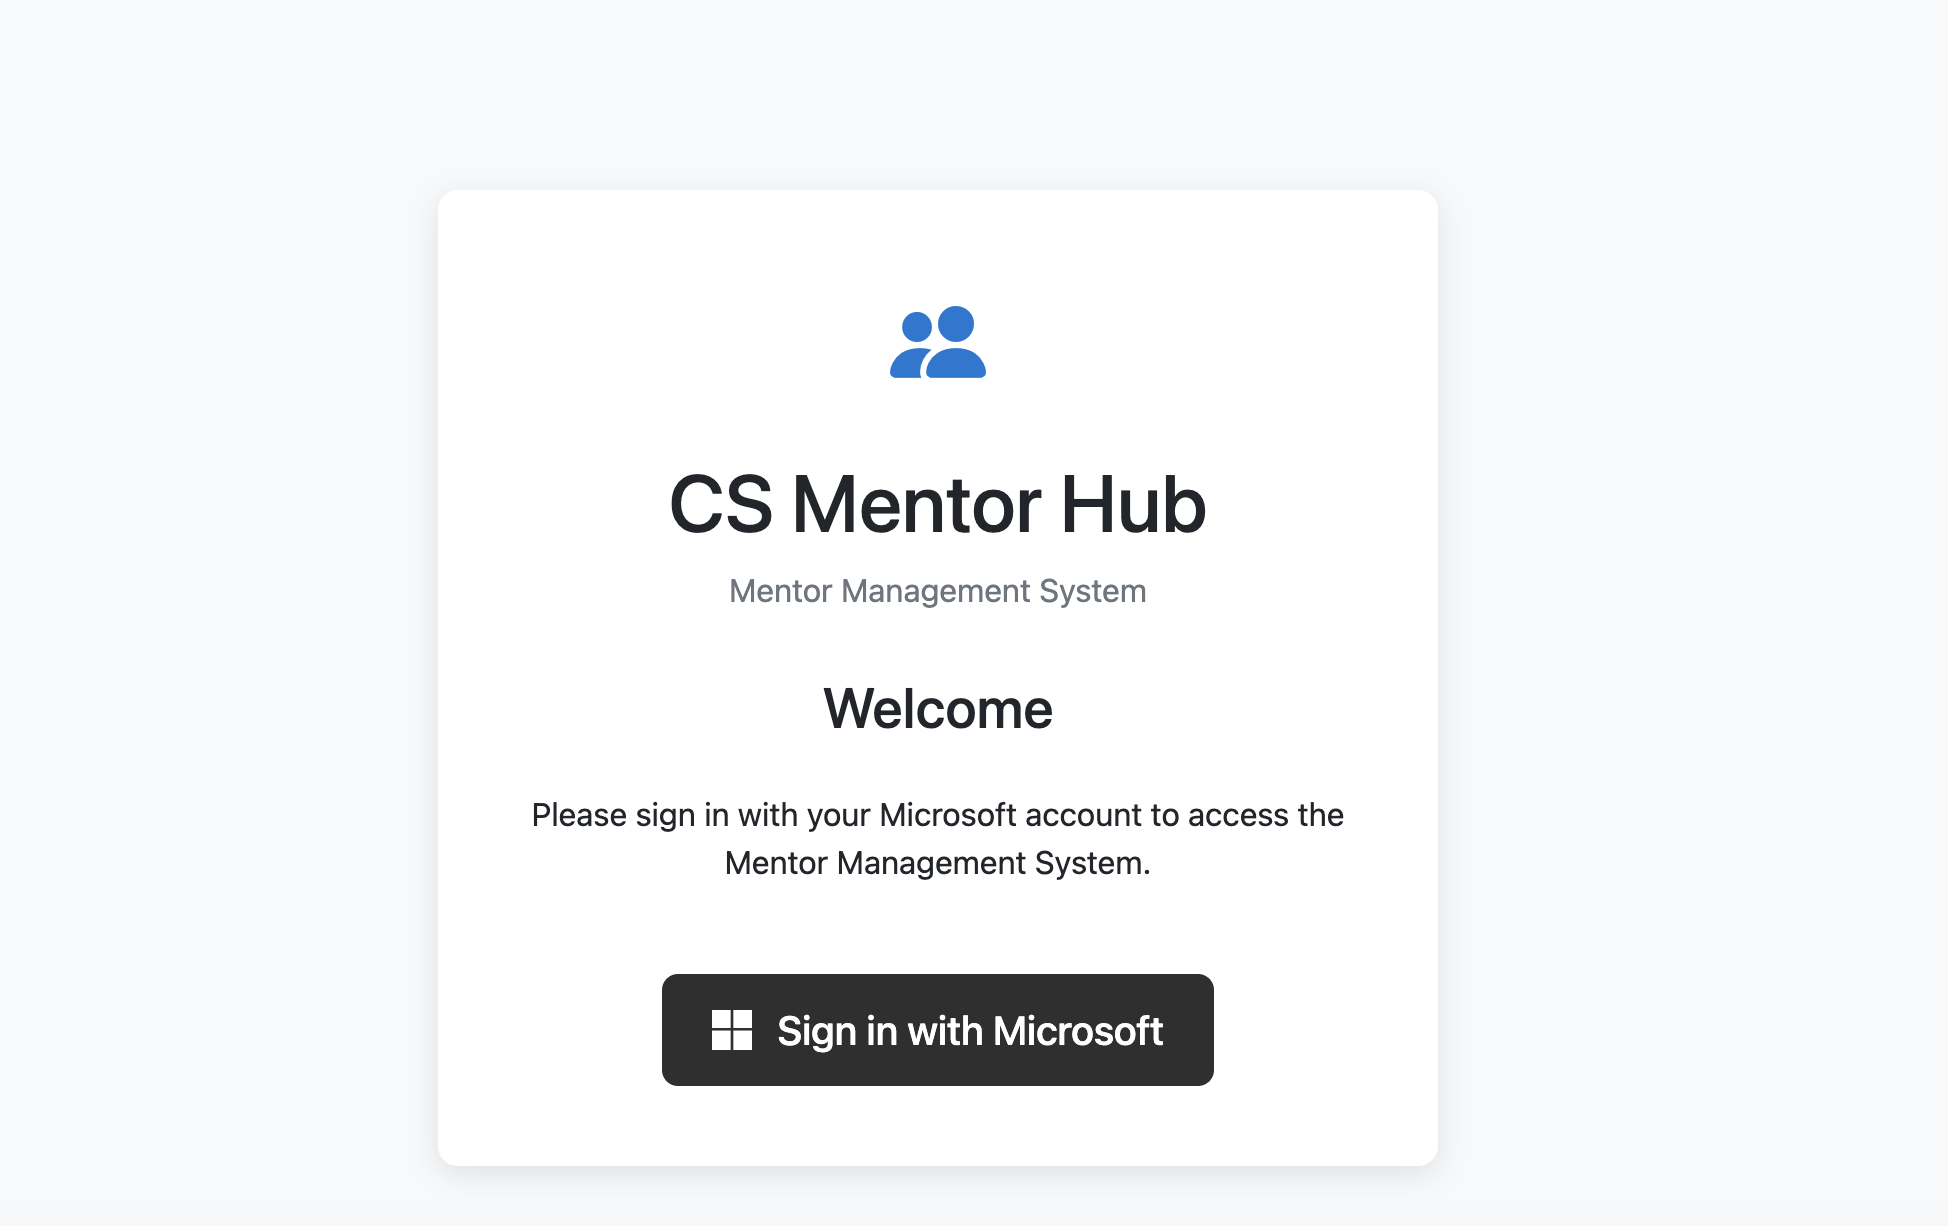
- Let students login wth their crimson emails
Our Project Video
About Us
Hi! We are 4 senior computer science students at the University of Alabama.

Bio
Hannah Hazelwood is a senior at the University of Alabama pursuing an undergraduate degree in computer science with a minor in mathematics. She is also currently pursuing her MBA...
My LinkedIn
My LinkedInMy Github!
My Github
Bio
Andrew is a senior computer science major at the University of Alabama. He is currently pursuing both his bachelors and masters and is planning to graduate in May 2025.
My Github
https://github.com/ahahn1UA
Bio
I am pursuing my Computer Science degree at the University of Alabama, along with the Accelerated Master's Program in Computer Science. I am interested in software development, data science and high-performance computing.
My LinkedIn
My LinkedInMy Github
My Github
Bio
Gregory is studying computer science and finance at the University of Alabama.
My LinkedIn
My LinkedInMy Github
My GithubOur Current Work
Project Pitch
Our first presentation was a Project Pitch, detailing the technology and motivation behind our project.
- Created - 01/21/2025
- Download a copy of the presentation here - Project Pitch Powerpoint
Sprint 1
This houses our Sprint 1 Final Deliverables
- Sprint Duration- 01/23/2025 - 02/18/2025
- Project Backlog - Download Excel document here!
- Sprint 1 Goals Document - Download Word document here!
- Sprint 1 Planning Document - Download Word document here!
- Sprint 1 Retrospective Document - Download Word document here!
- Sprint 1 Presentation - Download Powerpoint here!
Sprint 2
This will house our Sprint 2 Deliverables
- Sprint Duration - 02/20/2020 - 03/27/2025
- Project Backlog (updated for sprint 2 progress) - Download Excel document here!
- Sprint 2 Goals Document - Download Word document here!
- Sprint 2 Planning Document - Download Word document here!
- Sprint 2 Retrospective Document - Download Word document here!
- Sprint 2 Presentation - Download Powerpoint here!
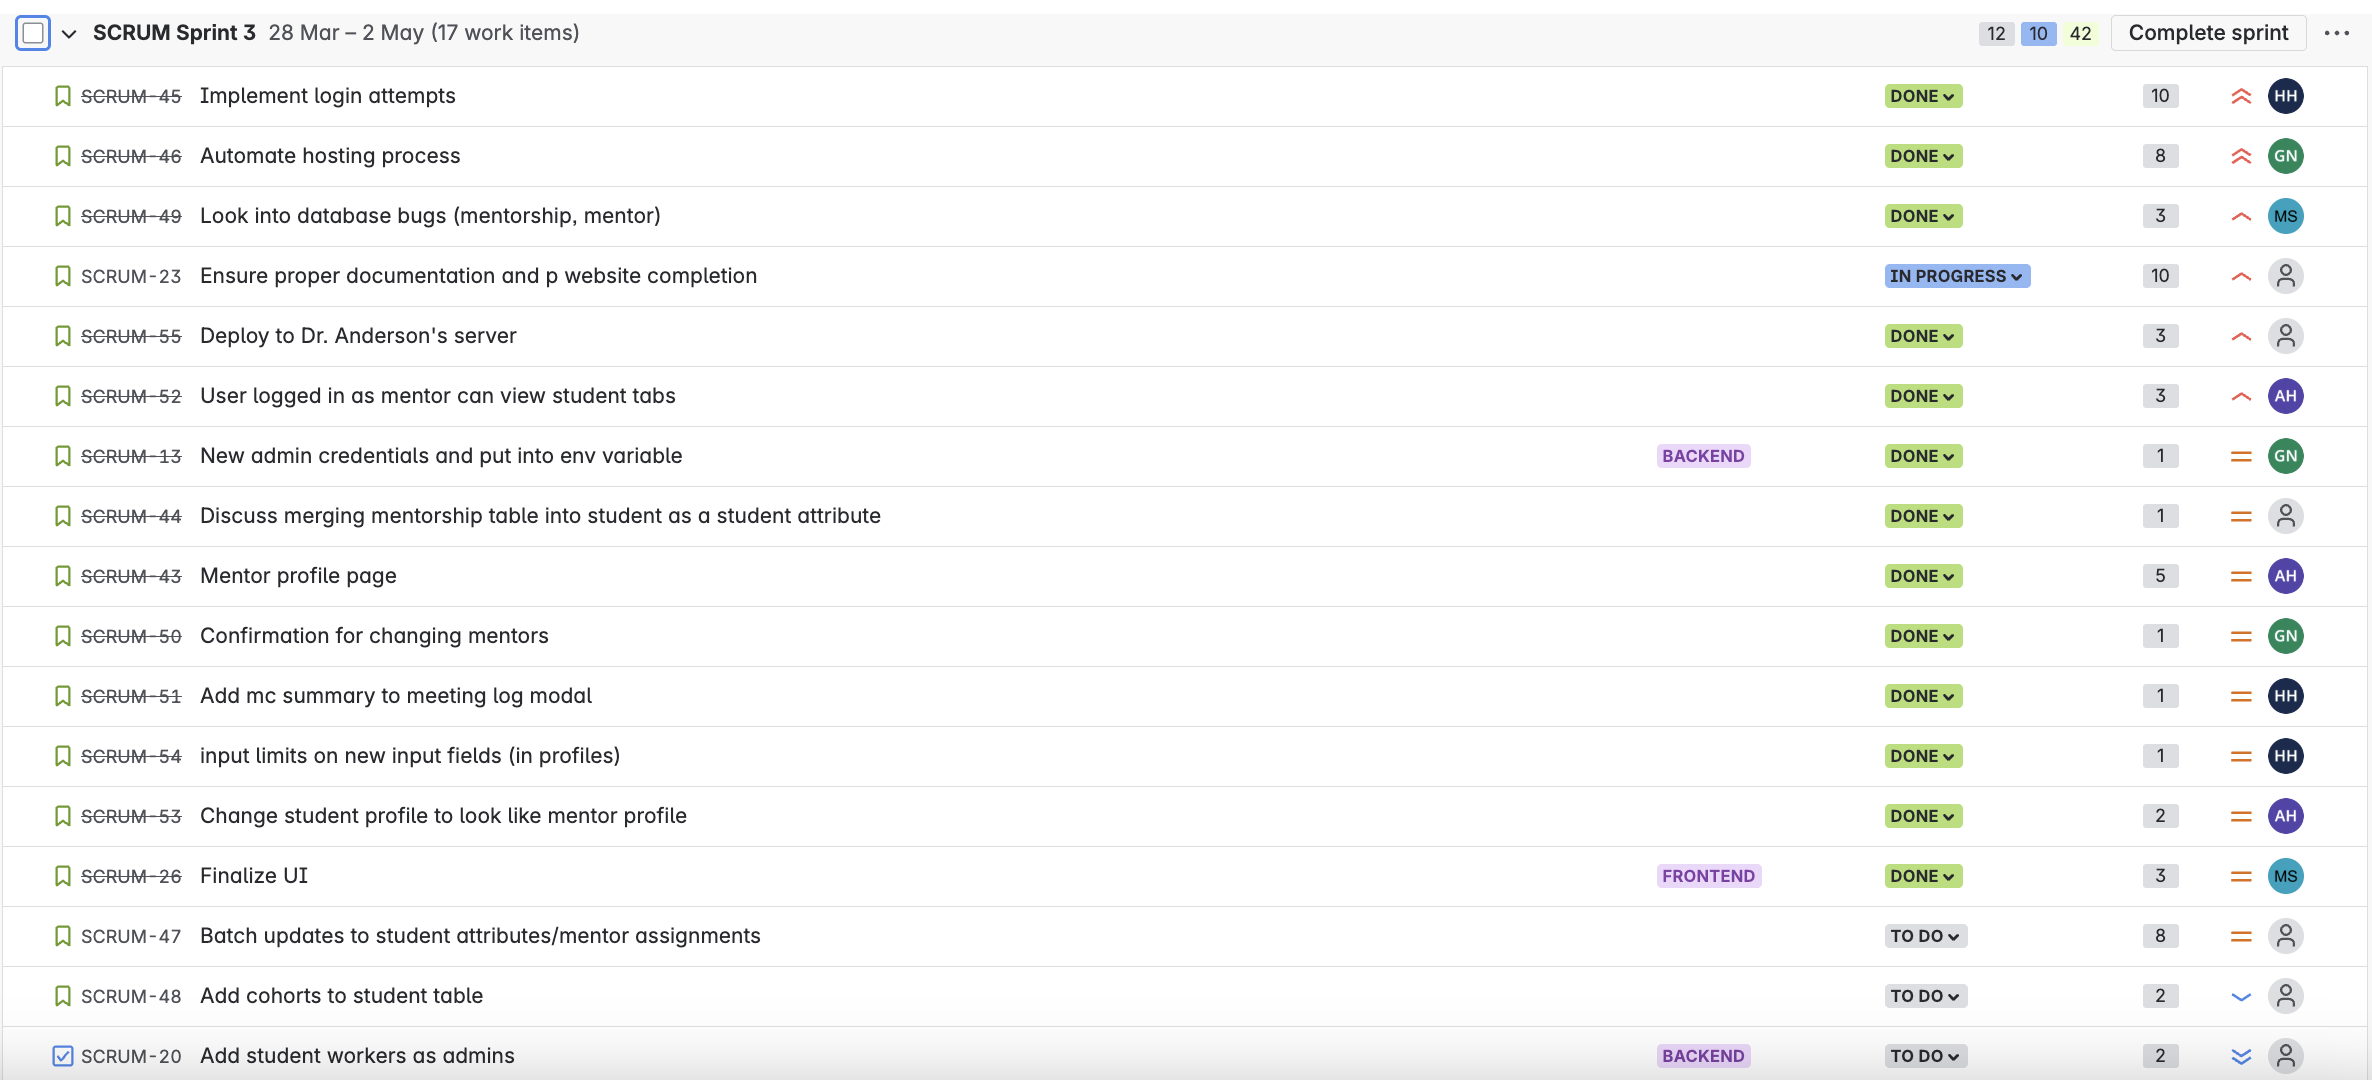
Sprint 3
This will house our sprint 3 deliverables!
- Sprint Duration - 03/27/2025 - 04/22/2025
- Project Backlog (updated for sprint 3 progress) - Download Excel document here!
- Sprint 3 Backlog - Download PNG here!
- Sprint 3 Planning Document - Download Word document here!
- Sprint 3 Presentation - Download Powerpoint here!
- Final Team Contributions - Download Word document here!
- Final Cybersecurity Task List - Download Word document here!

Our Source Code
Here are our two repositories for the project! We have two separate repositories to keep our mentor application private as it is connected to university information.
- Project Repository (private) - github.com/manjilasingh/mentor-management-system
- Project Website Repository (public) - github.com/mentor-management-system-cs495/mentor-management-system-cs495.github.io

Running our application
Please visit the How to Install Section of this website to see more detailed instructions on how to run the application!
Our application can be run through the cloud or on Docker locally! To use the application on the cloud, you can use the following links. For the frontend and main application, use https://34.170.92.44:3000/.
If using locally, you will need to download a copy of the GitHub repository (linked in the Source Code section of this website). Once you have a local clone of the application, you will need to make sure Docker Desktop is installed and running, and then run the command "docker-compose up -build" which will run the frontend, backend and database of the application.
To visit the frontend, visit "http://127.0.0.1:3000/". To visit the backend, visit "http://127.0.0.1:8000/admin/". Note that to access the backend you will need an admin login through a superuser
For more detailed instructions, please view the README file in the mentor management repository, which can be found at github.com/manjilasingh/mentor-management-system Please feel free to contact any of us with any questions.
How to Install our Application
Here are instruction on how to install and deploy our application.
Docker
For Mac: Install Docker Desktop on Mac
For Windows: Install Docker Desktop on Windows
For Linux: Install Docker Desktop on Linux
Other Technologies -- Downloaded through Docker, no action needed
Our Docker container will download all necessary dependencies for the project.
Our application is built with the Python Django Framework, using Python for the backend, Node.js / Express.js for the frontend, and PostgreSQL for the database.
Microsoft Azure
You'll need to create a Microsoft Azure account if you haven't already. There should be no payment requirements. In the Microsoft Azure home page, use the search bar to search for “App registrations”. During the handoff process from our team to yours, we should have made you an owner of our app registration. The display name for our app registration is PWEB. Its client id is 3f48444e-2a9f-43c8-bd43-badbd686b6c1, but you should be able to find it by just looking for the PWEB name. If you click on that PWEB name, you should be able to search for the manage>authentication tab, or search “authentication” in the app-specific search bar (not the other search bar, there are 2). The only thing you should change here is the redirect URI’s, which you have to include every time you change IP addresses for the app. The format of the redirect URI is currently https://{IP}:8000/authapp/microsoft/callback/
You can also add owners by navigating to manage>Owners (or using the app-specific search bar again)
1. Clone the Repository
git clone https://github.com/manjilasingh/mentor-management-system.git
open project root directory with “cd mentor-management-system"
2. Create .env file
Create the .env file inside the project root directory and add variables shown in the github README file. The values in the readme are just example values, which you can use if you like, but definitely change the passwords (obviously). And change the IP in the .env file to be the public IP of the machine you're deploying on.
3. Add the proper redirect URI to the Microsoft Azure app registration
(see our documentation's “How to Install Software” -> “External Resources Needed” -> “Microsoft Azure”)
4. Run the web application
use “docker-compose up --build” (make sure you have your docker app up and running)
If deploying to a server, build and run the container inside the server. The IP address of the server will be used as the base URL
Feature List
This page acts as a user manual for the features of the Mentor Management Website.
Shared Student and Mentor Features
Student Features
Mentor Features
Admin Features
Where to Find
Access using the navigation bar and click “Log a Meeting” in the student view. Or, when logged in as a student, can access at the URL ending, :3000/student/meeting-log (example: https://10.8.0.56:3000/student/meeting-log)
How to Use
-
A student should use this page to fill out a form to log any meetings between a mentor and mentee.
-
The form has the following fields: email (text), preferred name (text), CWID (text, 8-character limit), major (dropdown select - computer science or cybersecurity), minor (text), student notes (text), interest/meeting summary (multi-select)
Note that the interest/meeting summary acts as a simple summary of what was discussed in the meeting (ex. Internships, research opportunities, time management etc.)
-
After navigating to the form, the form should be pre-filled with student's information. The student can make edits to their major or minor if something has changed, then they can fill out the fields of the form giving details about their meeting.
-
When all information is inputted, a student will use the submit button to submit the form. All fields are required. On successful submission, the student will be redirected to the landing page. Submission of this form will add an entry to the meeting-log table in the database.
-
If any information related to a student is changed in the form (preferred name, major, minor etc) the student table will be updated to reflect this change.
Additional Considerations
-
If a developer or admin is testing this page, they may have access to both the admin and the student views. In this case, the admin MUST be logged out of the admin dashboard before attempting to submit a meeting log. If not logged out, the form will not be submitted due to CSFR (Cross Site Request Forgery) checks failing.
-
The student email and student CWID fields will not be editable in this form, but they are required. With the pre-fill functionality, this should not cause issues. That being said, when a student is added, they MUST have an email and CWID associated with them.
Student:
Mentor:
Where to Find
Access using the navigation bar and click “Log a Meeting” in the student view. Or, when logged in as a student, can access at the URL ending, :3000/student/meeting-log (example: https://10.8.0.56:3000/student/meeting-log)
How to Use
-
A student should use this page to fill out a form to log any meetings between a mentor and mentee.
-
The form has the following fields: email (text), preferred name (text), CWID (text, 8-character limit), major (dropdown select - computer science or cybersecurity), minor (text), student notes (text), interest/meeting summary (multi-select)
Note that the interest/meeting summary acts as a simple summary of what was discussed in the meeting (ex. Internships, research opportunities, time management etc.)
-
After navigating to the form, the form should be pre-filled with student's information. The student can make edits to their major or minor if something has changed, then they can fill out the fields of the form giving details about their meeting.
-
When all information is inputted, a student will use the submit button to submit the form. All fields are required. On successful submission, the student will be redirected to the landing page. Submission of this form will add an entry to the meeting-log table in the database.
-
If any information related to a student is changed in the form (preferred name, major, minor etc) the student table will be updated to reflect this change.
Additional Considerations
-
If a developer or admin is testing this page, they may have access to both the admin and the student views. In this case, the admin MUST be logged out of the admin dashboard before attempting to submit a meeting log. If not logged out, the form will not be submitted due to CSFR (Cross Site Request Forgery) checks failing.
-
The student email and student CWID fields will not be editable in this form, but they are required. With the pre-fill functionality, this should not cause issues. That being said, when a student is added, they MUST have an email and CWID associated with them.
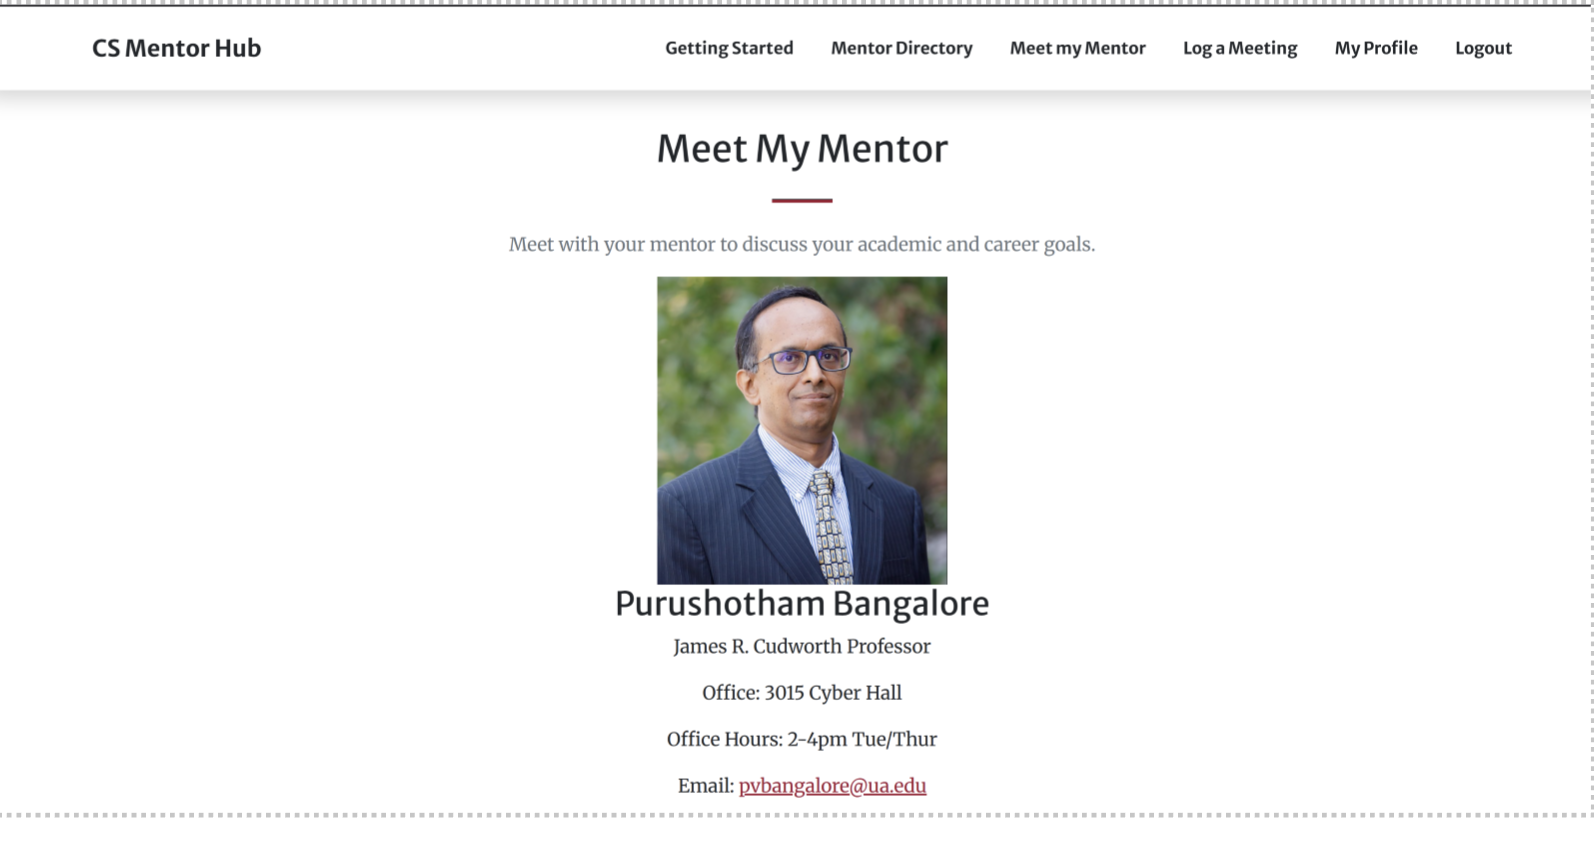
Where to Find
You can access it from the navigation bar under “Meet my Mentor” tab.
Purpose
Allow students to view their assigned mentor's contact information.
How to Use
-
The page automatically displays your assigned mentor's contact information: profile photo, full name, office hours and email address.
-
If you see an empty page, contact Dr. Monica Anderson (Anderson.cs.ua.edu) to request a mentor assignment.
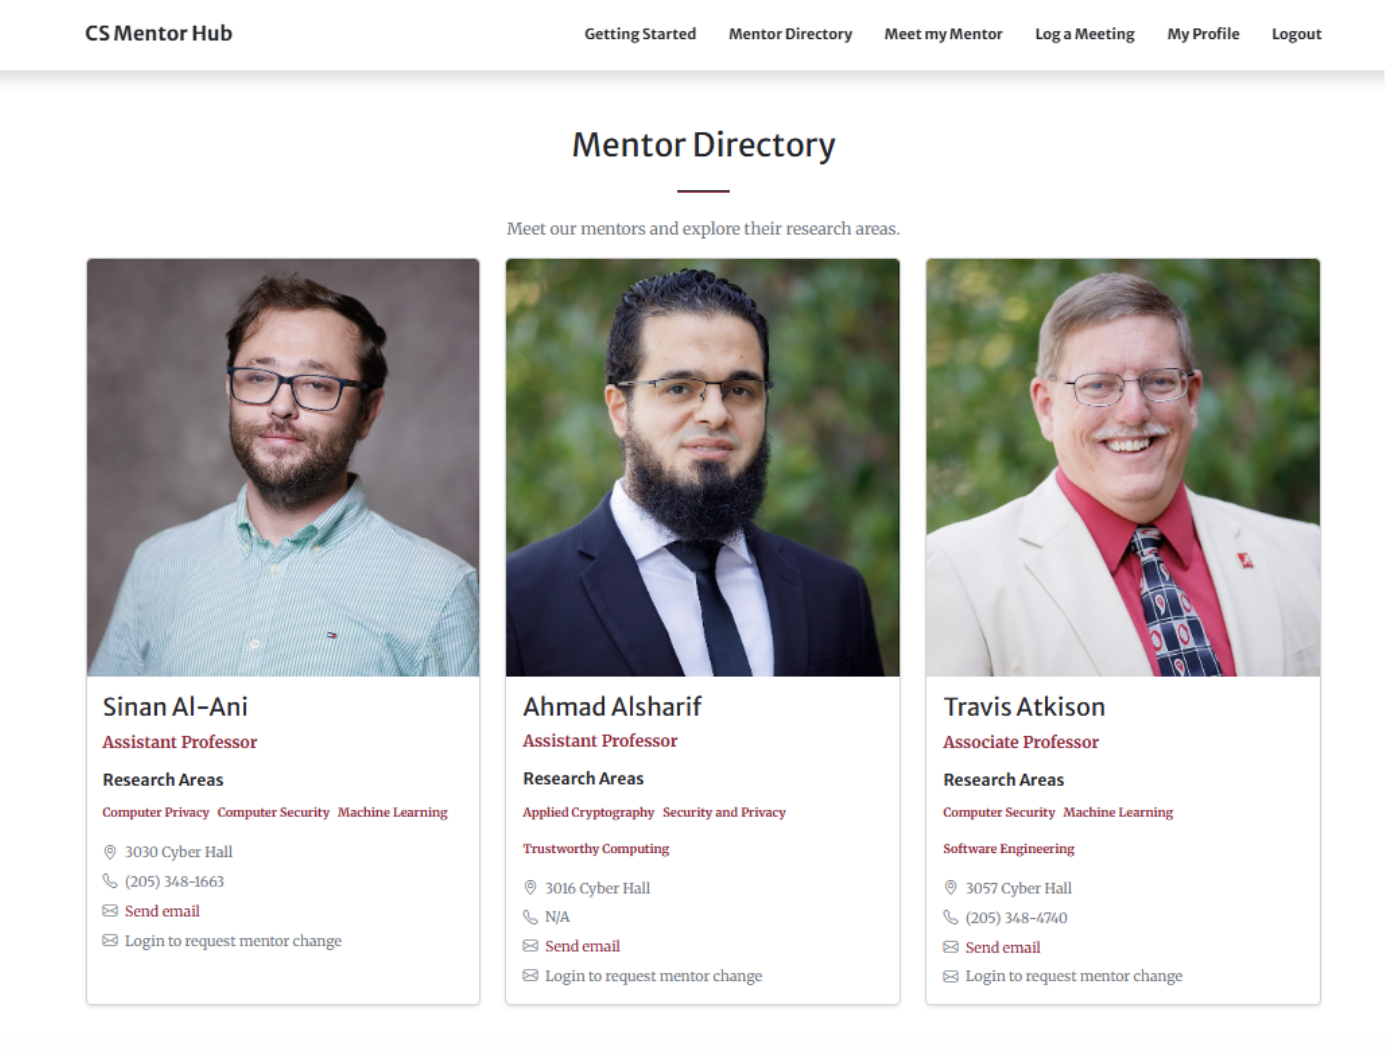
Where to Find
You can access it in the navigation bar under “Mentor Directory”. This page is available for both mentors and students.
Purpose
To allow students to view all available mentors and to allow them to request a mentor change.
How to Use
-
Each mentor’s information is displayed in a card with their full name, title, research areas, office hours, phone number, email address and an option to request change to the mentor.
Where to Find
You can access it by clicking “Request change to this mentor” on a mentor's profile card in the mentor directory page.
Purpose
To allow students to request a mentor change.
How to Use
-
To request a mentor change, click on the “Request change to this mentor” link under the mentor you wish to switch to.
-
A pop up will appear that says “You are REQUIRED to confirm that this mentor is alright with you switching to them! Send them an email if you haven't yet, BEFORE emailing administration to make the change.” Once you are sure hit Send Email.
-
Once you click on send email, it will generate a prefilled email with to: Dr. Anderson email (anderson@cs.ua.edu), subject: Mentor Change Request and email body that says “This student is requesting a mentor change to {new mentor's email address}”
Where to Find
Access using the navigation bar and click “Log a Meeting” in the student view. Or, when logged in as a student, can access at the URL ending, :3000/student/meeting-log (example: https://10.8.0.56:3000/student/meeting-log)
How to Use
-
A student should use this page to fill out a form to log any meetings between a mentor and mentee.
-
The form has the following fields: email (text), preferred name (text), CWID (text, 8-character limit), major (dropdown select - computer science or cybersecurity), minor (text), student notes (text), interest/meeting summary (multi-select)
Note that the interest/meeting summary acts as a simple summary of what was discussed in the meeting (ex. Internships, research opportunities, time management etc.)
-
After navigating to the form, the form should be pre-filled with student's information. The student can make edits to their major or minor if something has changed, then they can fill out the fields of the form giving details about their meeting.
-
When all information is inputted, a student will use the submit button to submit the form. All fields are required. On successful submission, the student will be redirected to the landing page. Submission of this form will add an entry to the meeting-log table in the database.
-
If any information related to a student is changed in the form (preferred name, major, minor etc) the student table will be updated to reflect this change.
Additional Considerations
-
If a developer or admin is testing this page, they may have access to both the admin and the student views. In this case, the admin MUST be logged out of the admin dashboard before attempting to submit a meeting log. If not logged out, the form will not be submitted due to CSFR (Cross Site Request Forgery) checks failing.
-
The student email and student CWID fields will not be editable in this form, but they are required. With the pre-fill functionality, this should not cause issues. That being said, when a student is added, they MUST have an email and CWID associated with them.
Where to Find
Navigate to the student profile by clicking the My Profile button at the top when logged in as a student
Purpose
To allow students to update their information.
How to Use
-
This page allows a student to view their profile (Name, email, cwid, preferred name, major and minor)
-
This page allows the student to edit their preferred name, major and minor
-
To change an option, simply change the value and hit “Save Changes”
Where to Find
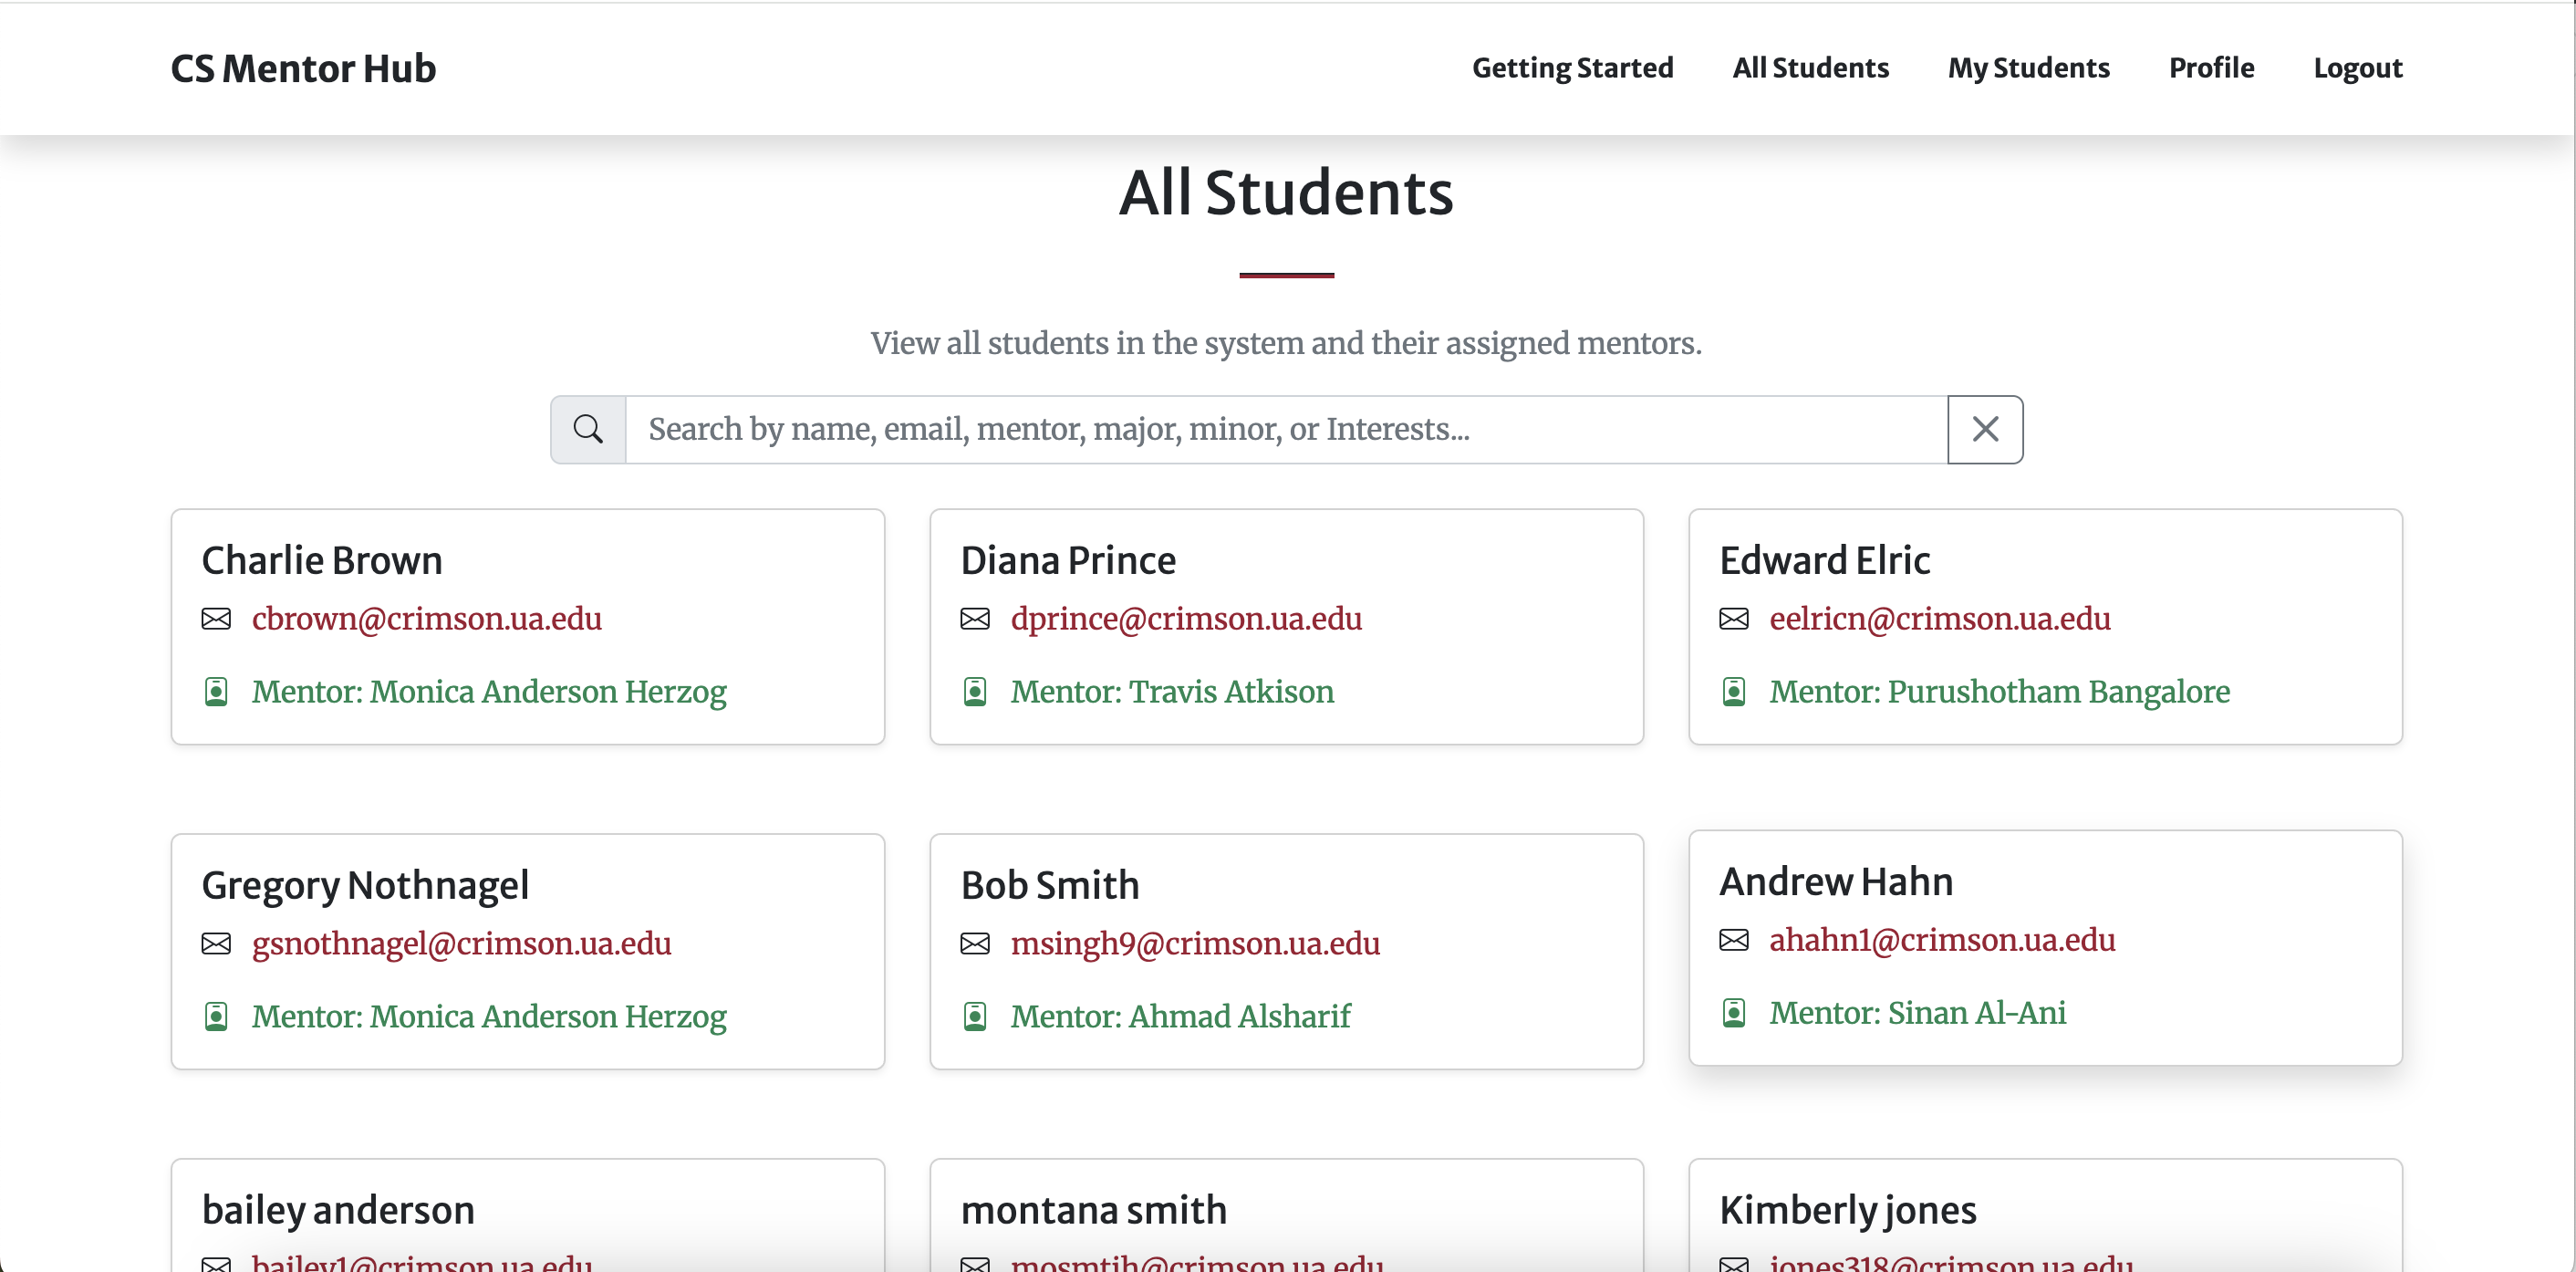
Navigate to the all students page by hitting the all students button at the top when logged in as a student
Purpose
To allow mentors to see all students in the system.
How to Use
-
This page allows a mentor to view all the students in the system and who their mentors are
-
Clicking on a student pulls up their profile information and their meeting log
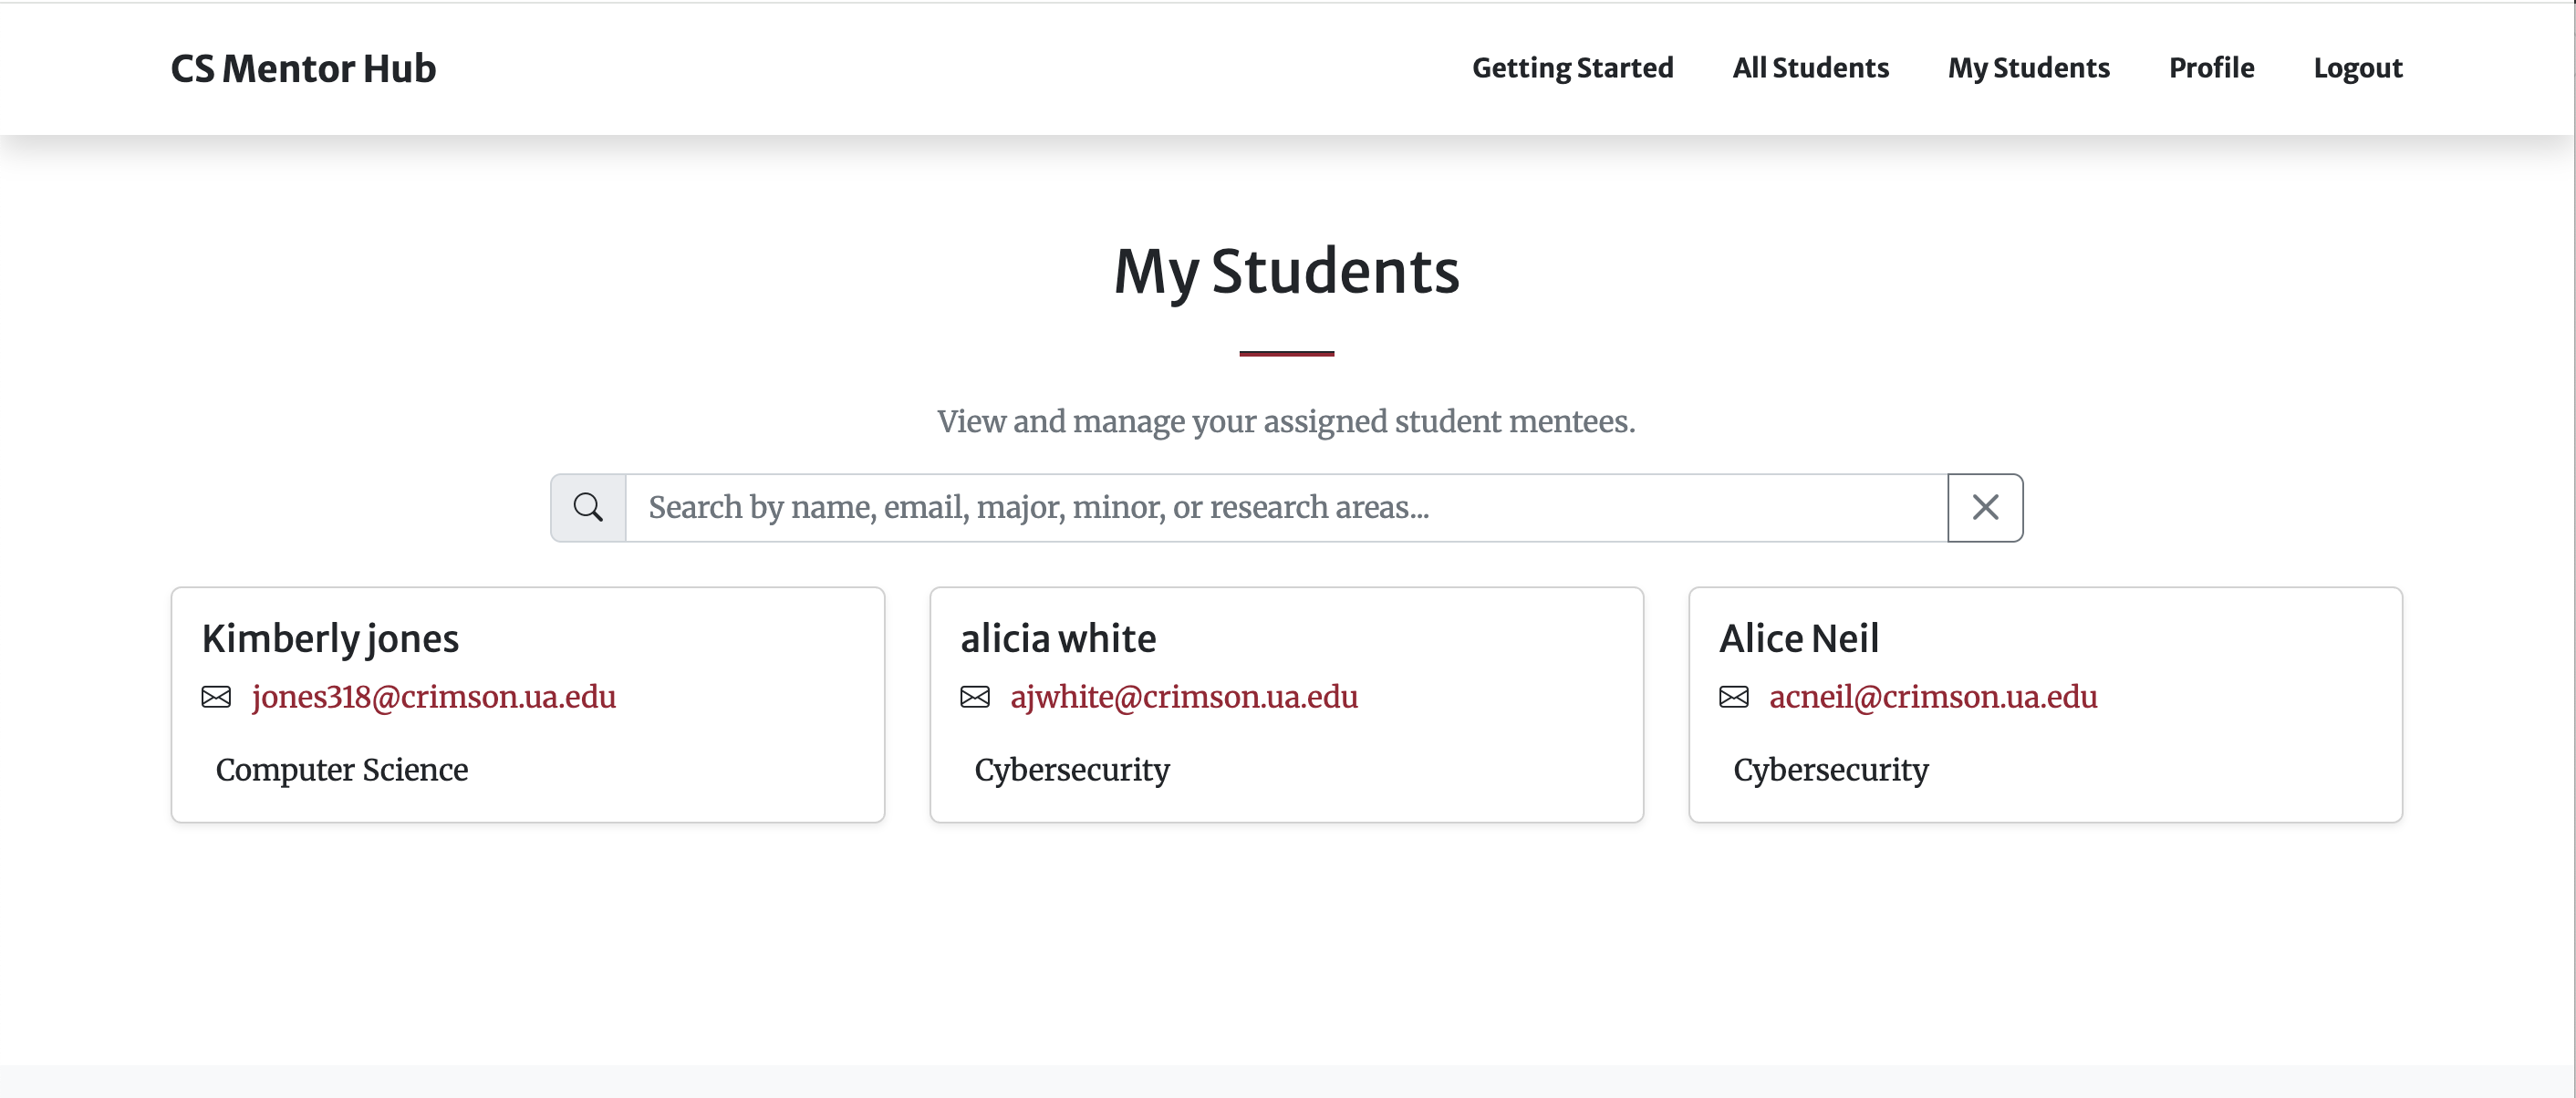
Where to Find
Navigate to the my students page by hitting the my students button at the top when logged in as a student
Purpose
To allow mentors to see all students in the system.
How to Use
-
This page allows a mentor to view all the students in the system and who their mentors are
-
Clicking on a student pulls up their profile information and their meeting log
Where to Find
The My Students tab in the mentor view (:3000/mentor/meet-my-mentor) or the All Students tab in the mentor view (:3000/mentor/mentor-directory)
Purpose
To allow mentors to track meetings that a student participates in.
How to Use
-
While logged in as a mentor, visit either the All Students tab or the My Students tab
-
In either of these pages, click on a student to pull up that student's information.
-
In the modal that will pop up, there will be a section detailing details about the student. This includes the meeting logs. The modal will show the Date, Meeting/Interest Summary, Student Notes and Mentor Notes for each meeting a student has.
Note that all mentors can see all meeting logs for any student.

Where to Find
The My Students tab in the mentor view (:3000/mentor/meet-my-mentor)
Purpose
To allow mentors to add notes to meetings they have had with their mentees.
How to Use
-
While logged in as a mentor, visit the My Students tab.
-
In either of these pages, click on the student you wish to add mentor notes to.
-
In the model, there will be a section showing all meeting logs for that student. Find the desired meeting log (you will most likely use the date to identify it) and click the pencil icon in that meeting row.
-
Type the desired notes and click save.
-
The mentor notes will be updated in the database and the student modals should showcase this change automatically.
Where to Find
Navigate to the mentor profile by clicking the Profile button at the top when logged in as a mentor (:3000/mentor/profile)
Purpose
To allow mentors to edit their information, most importantly their office hours.
How to Use
-
This page allows a mentor to view their profile (Name, email, title, research areas, office, office hours and phone)
-
This page allows the mentor to edit their title, research areas, office, office hours and phone
-
To change an option, simply change the value and hit “Save Changes”
Where:
Can be found when trying to access the Backend server.
(https://10.8.0.56:8000/admin/)
Purpose:
To secure the admin dashboard and keep out unwanted users.
How to Use:
-
To use the admin dashboard, you will need to login using the admin login page.
-
The user credentials will be created on deployment of the application. The password is set in the .env file, and the username is set in the entrypoint.sh file
-
If the Admin credentials are entered incorrectly, the screen will display a standard error message. You have 3 attempts to log into the admin dashboard.
-
If you exceed 3 attempts, you will be locked out of the admin dashboard for 1 minute before the attempt resets. The lockout is based on computer IP address.
Additional Considerations:
The cooldown period and attempt limit will be set in the development of the application and cannot be changed after deployment without redeploying the site. These features can be edited through the settings.py file. The cool off time is set by AXES_COOLOFF_TIME, and the limits are set through AXES_FAILURE_LIMIT (default is 3).
Documentation for Django Axes (what is used to implement login attempts) can be found in the Miscellaneous Documentation section in the How to Modify Page
Where:
This is done in the Django Admin Dashboard, which is found at (https://10.8.0.56:8000/admin/myproject/)
How to Use:
In the dashboard, click on any table to view it. You can view axes tables for login attemps, users to view the admins, and then you can view the mentor, student, mentorship and meeting log tables that are a part of our project.
Where
This is done in the Django Admin Dashboard, which is found at (https://10.8.0.56:8000/admin/myproject/)
Purpose:
To manage and make changes to the database to store information about mentors and students
Create (Add)
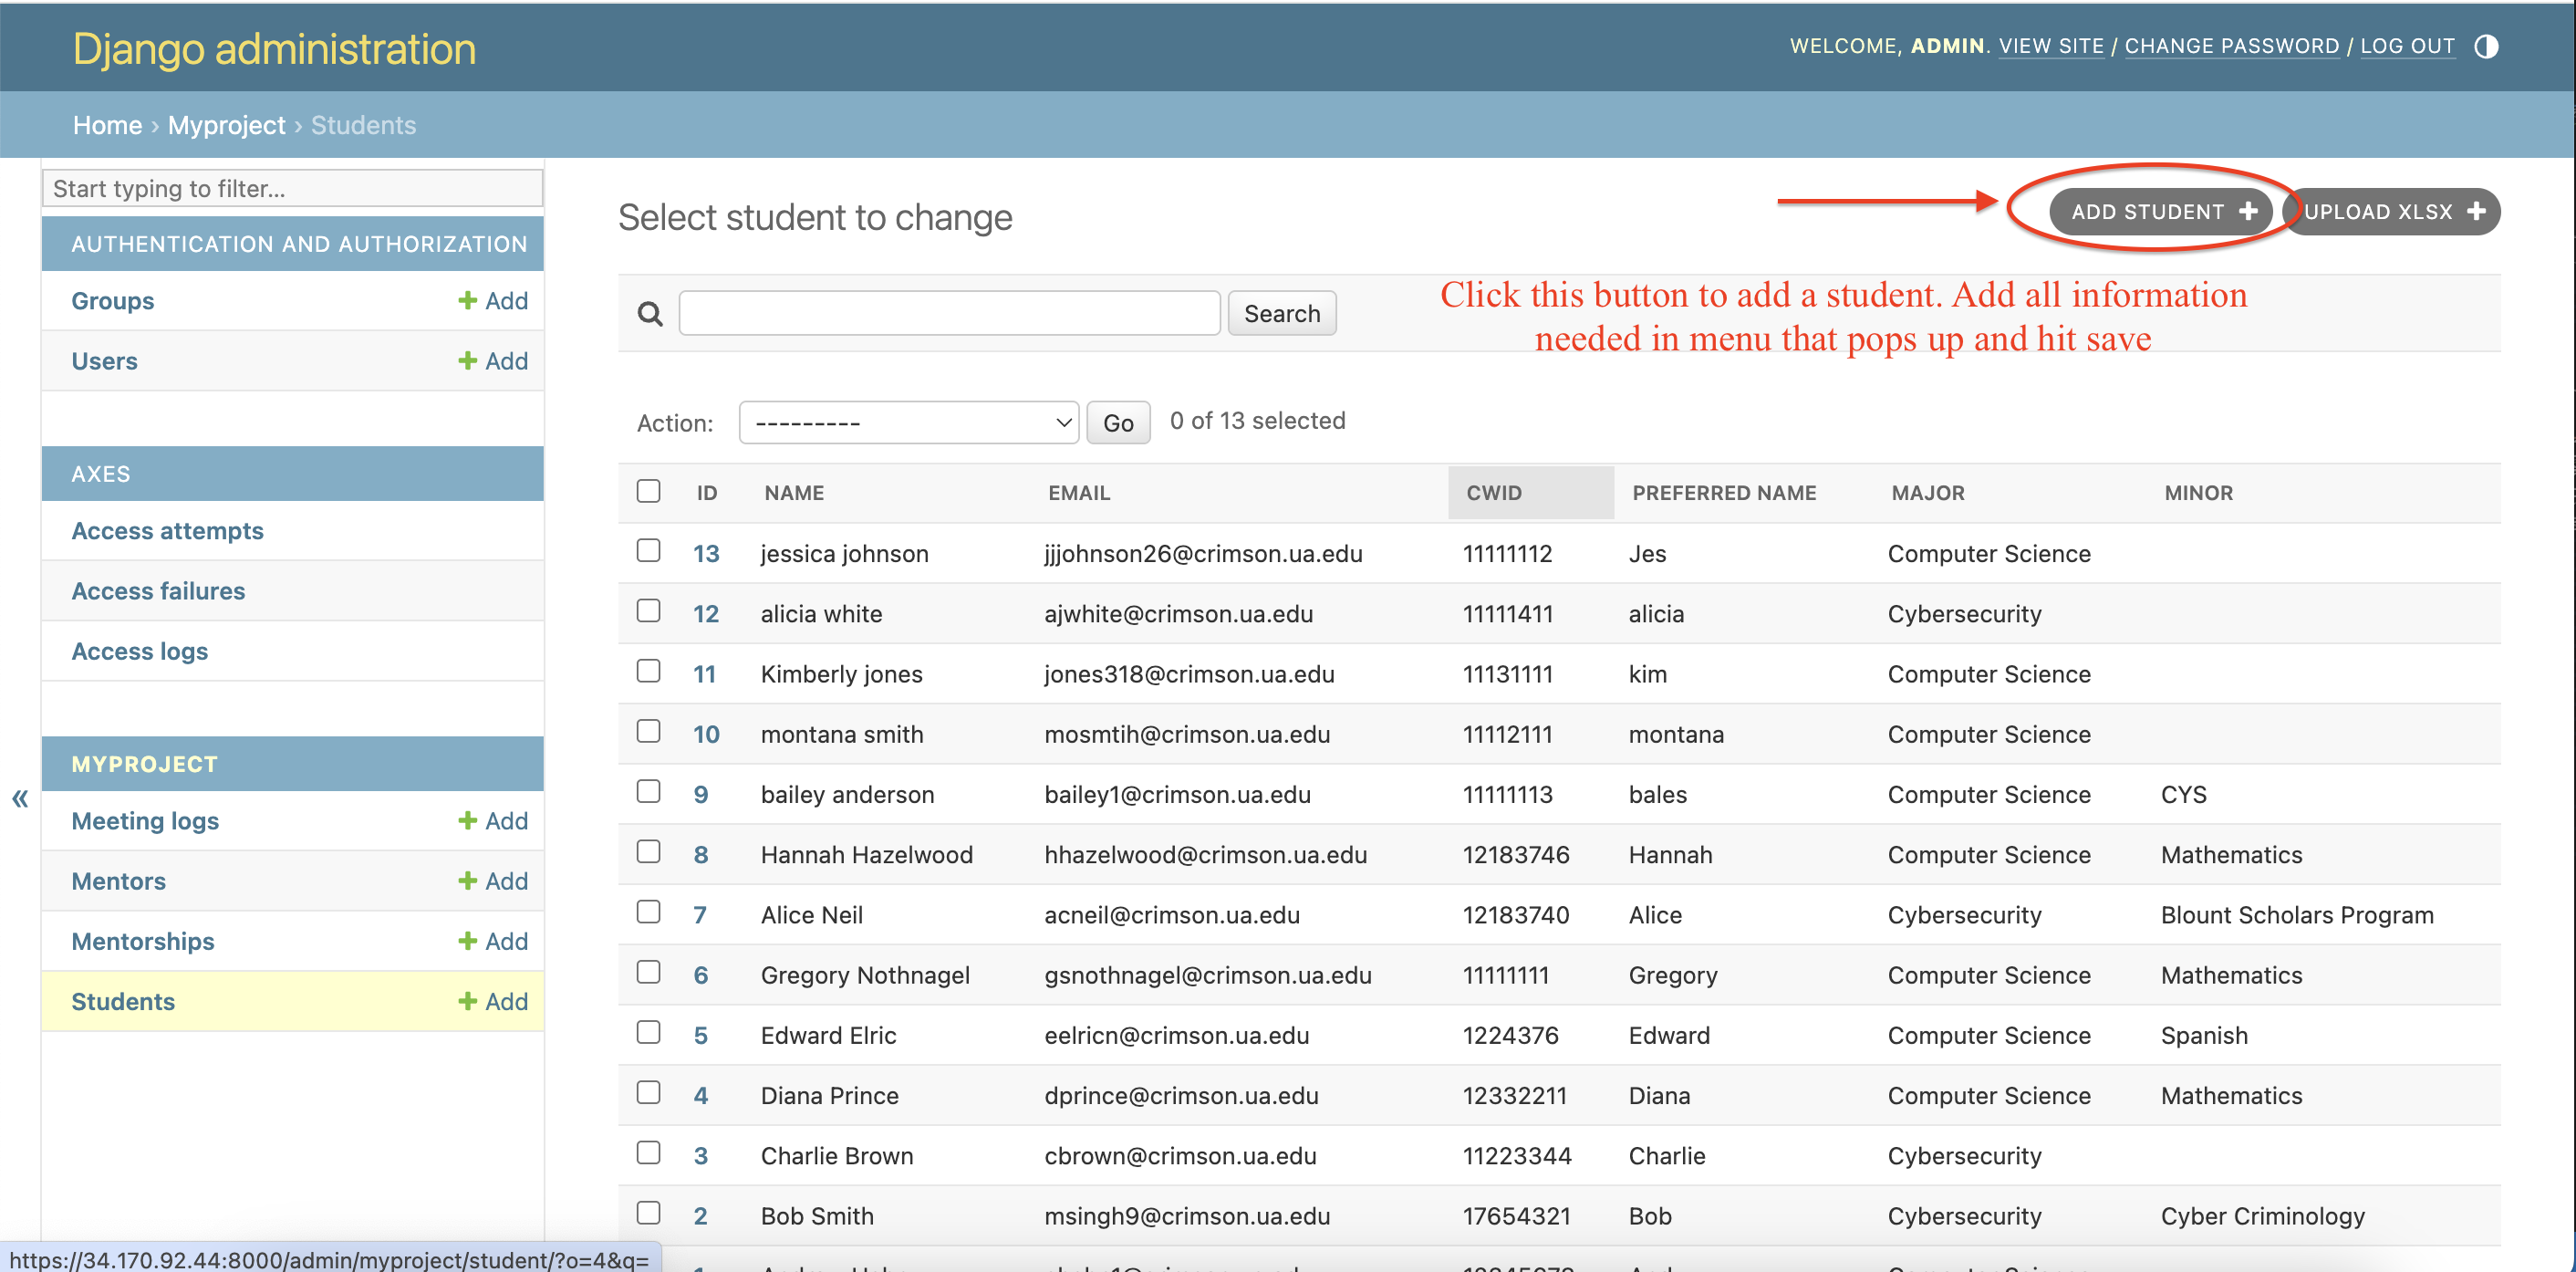
-
Navitate to the table you want to add an entry to
-
In the top right corner, click the add button (for example, the “ADD MEETING LOG+” button in the meeting log table).
-
This will open a form to fill out the attributes for that entry. The optional attributes will be grayed out. For example, see the student table add student form that has the words “minor” and “preferred name” in gray.
To cancel, click the back arrow or the table tab on the left to return to the original table
-
Once the information is in, click SAVE to save the student, “save and add another” to reopen the same form to add a second entry, or “save and continue editing” to add the entry to the table but keep the form open to make edits to the entry.
Retrieve (Search)
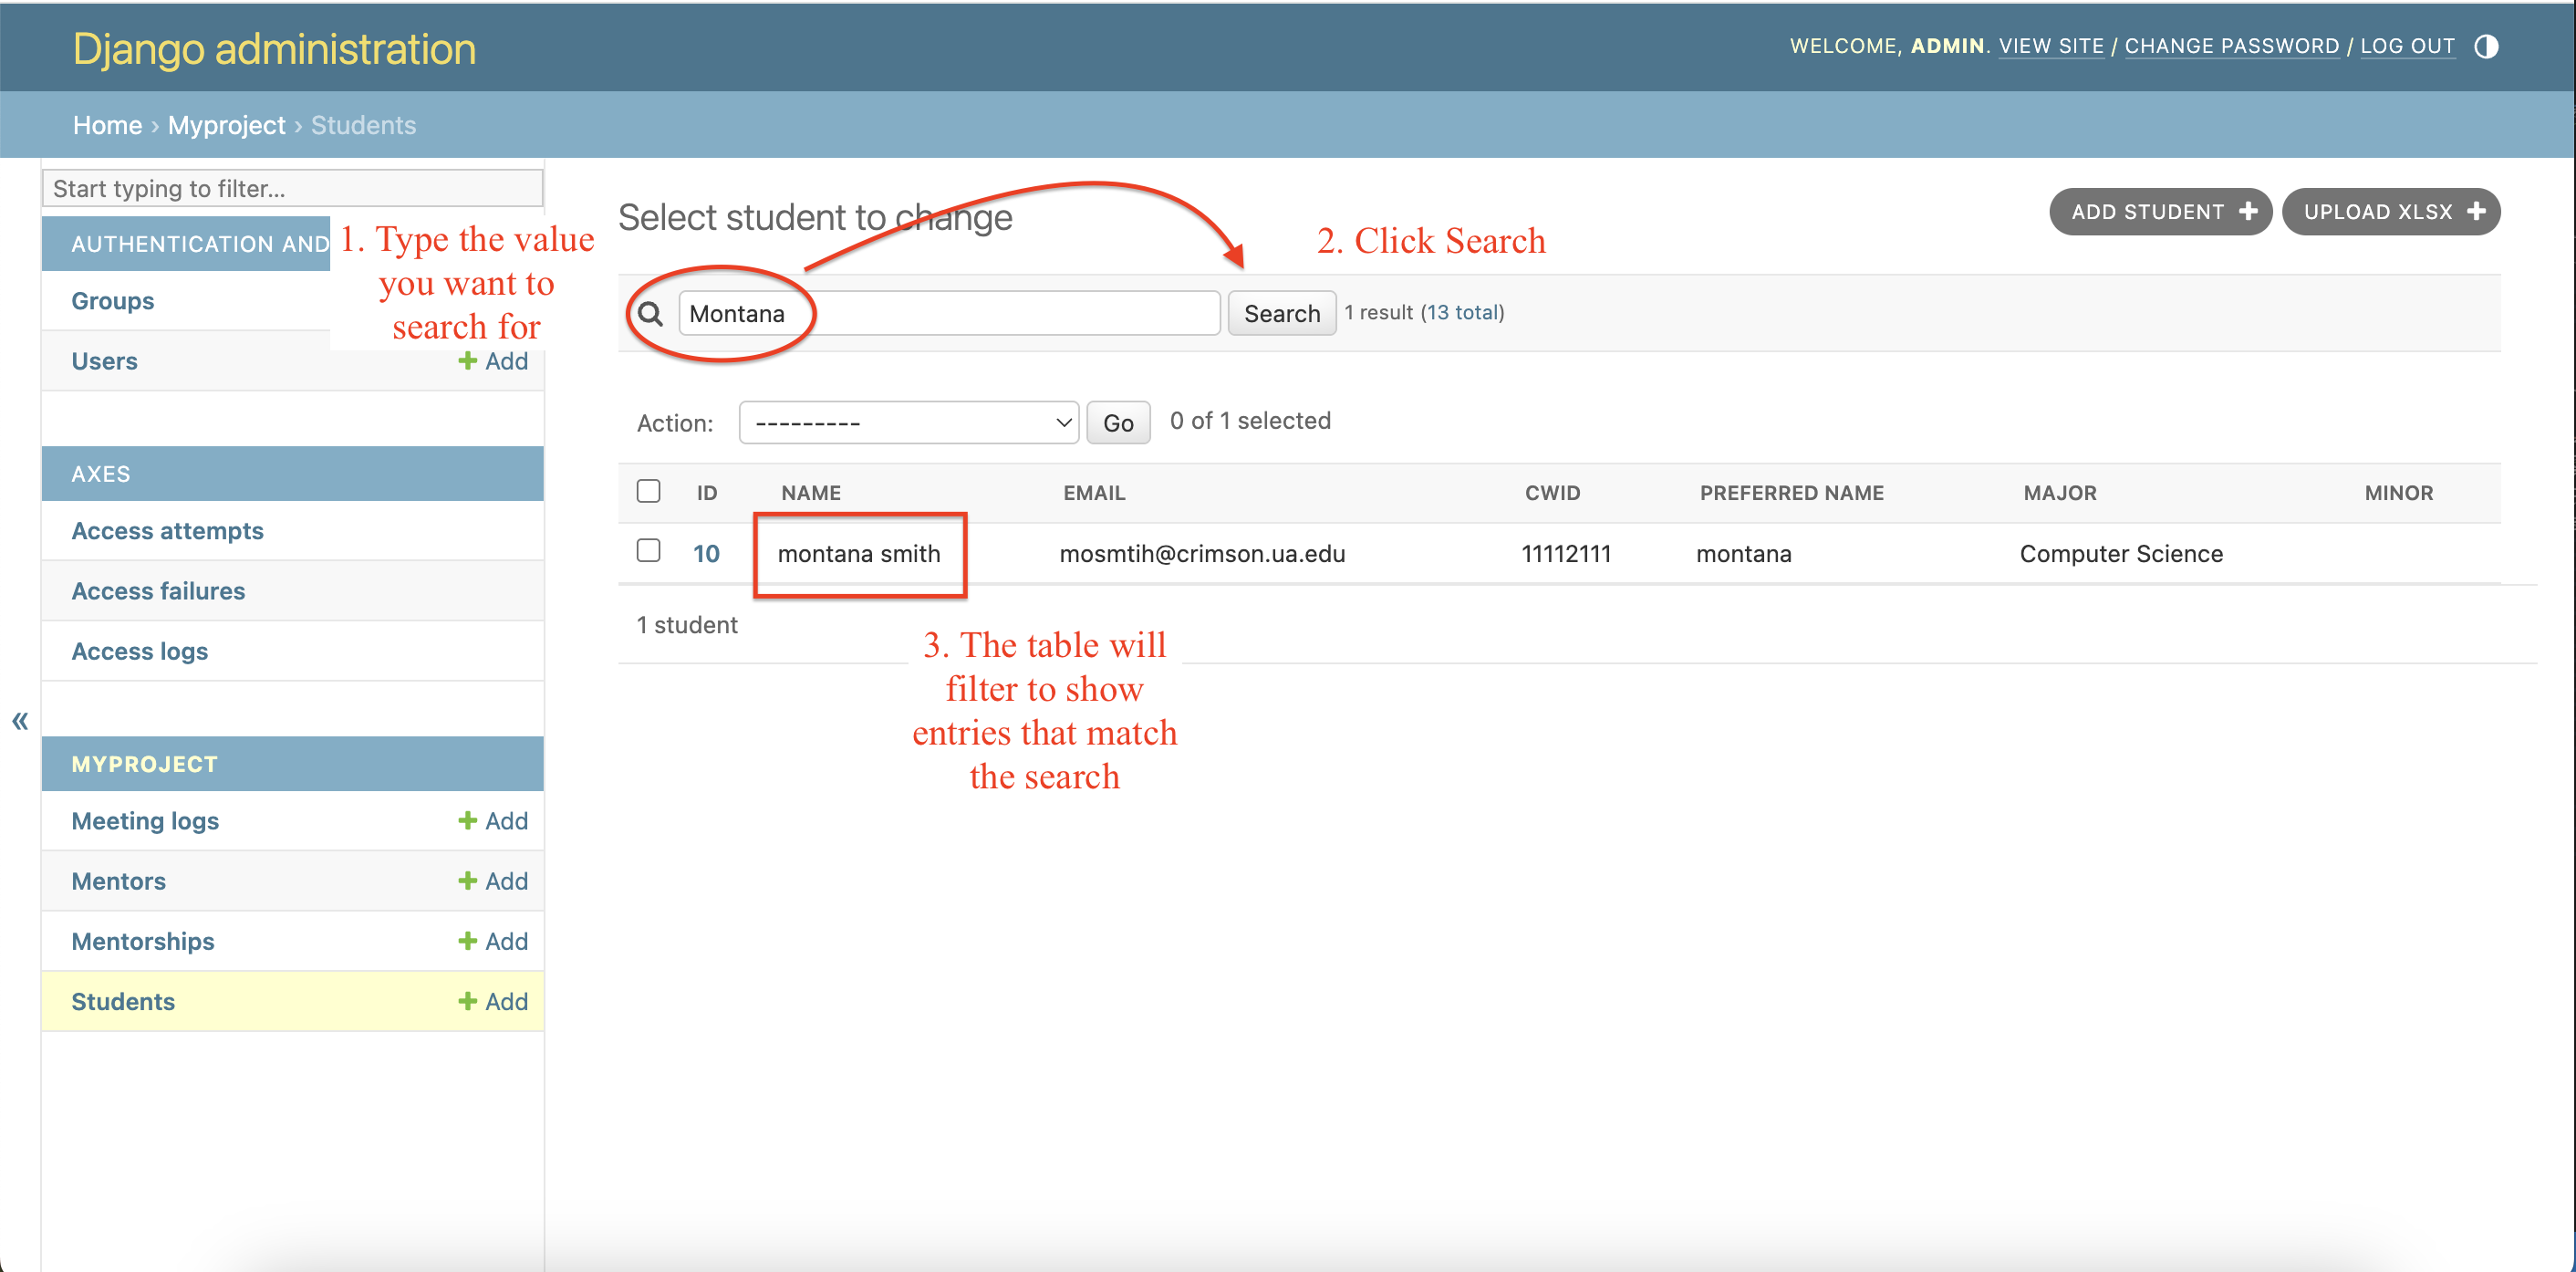
-
Navitate to the table you want to find an entry in
-
The mentor, meeting log, and student tables have a search bar at the top of the table. You can type anything in this, and it will pull up any entries that contain this text in any of their rows. For example, if you search for a name, it will pull up the entry that matches that name. If you search for “Computer Science” it will pull up any students that have computer science as their major/minor.
-
Note that the meeting log table can also be filtered. In the right of the table, there is a Filter section, where you can filter by meeting date and choose a restriction of how recent of entries you want to see.
-
Note that the mentorship table does not have search functionality. With many mentorship relationships, this may be confusing, so you can use CTRL F (or CMD F on mac) to type a student name and pull up their entry.
Update (Edit)
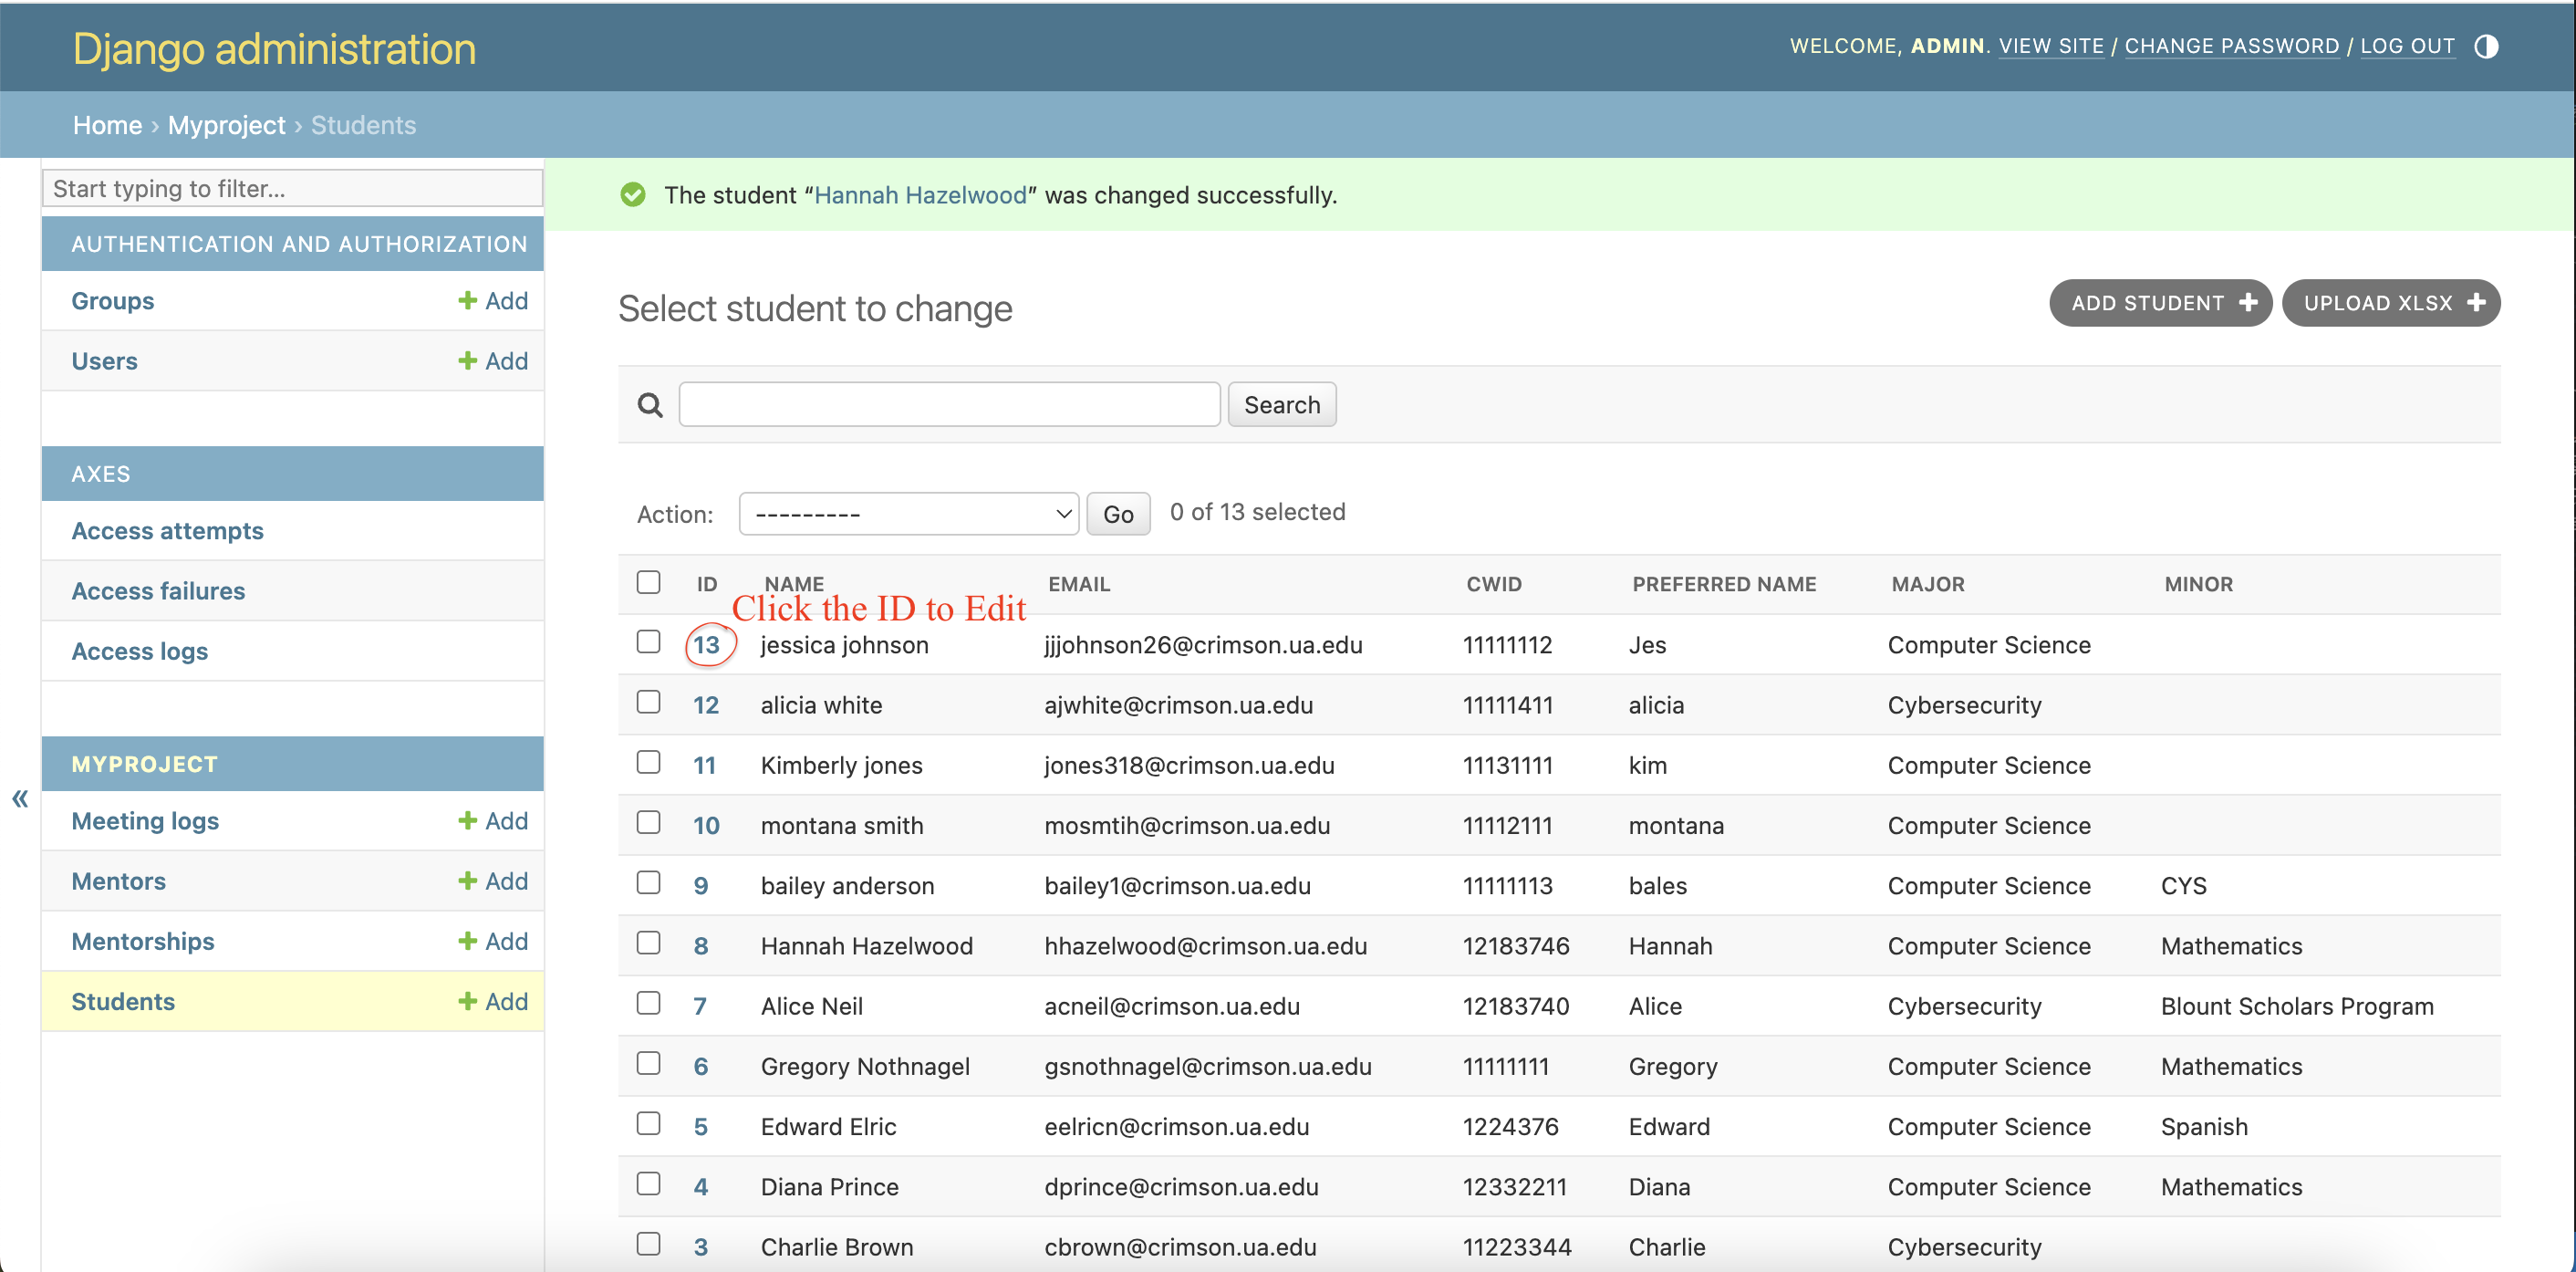
-
Navitate to the table you want to update an entry from
-
Find the entry you want to update, then click the blue ID number for that entry. This will open up a form with all of the fields for that entry. It will be filled with the current values for each field.
-
Make any necessary changes, then, like the add functionality, click either “save,” “save and add another,” or “save and continue editing.”
-
There is also a change history for entries that have been changed. Click on the “History” button on the top right of the edit form, and it will show the past edits to that entry, showing what was changed, who made the change, and the date the change was made. It will not show the past value of the change, however.
Delete
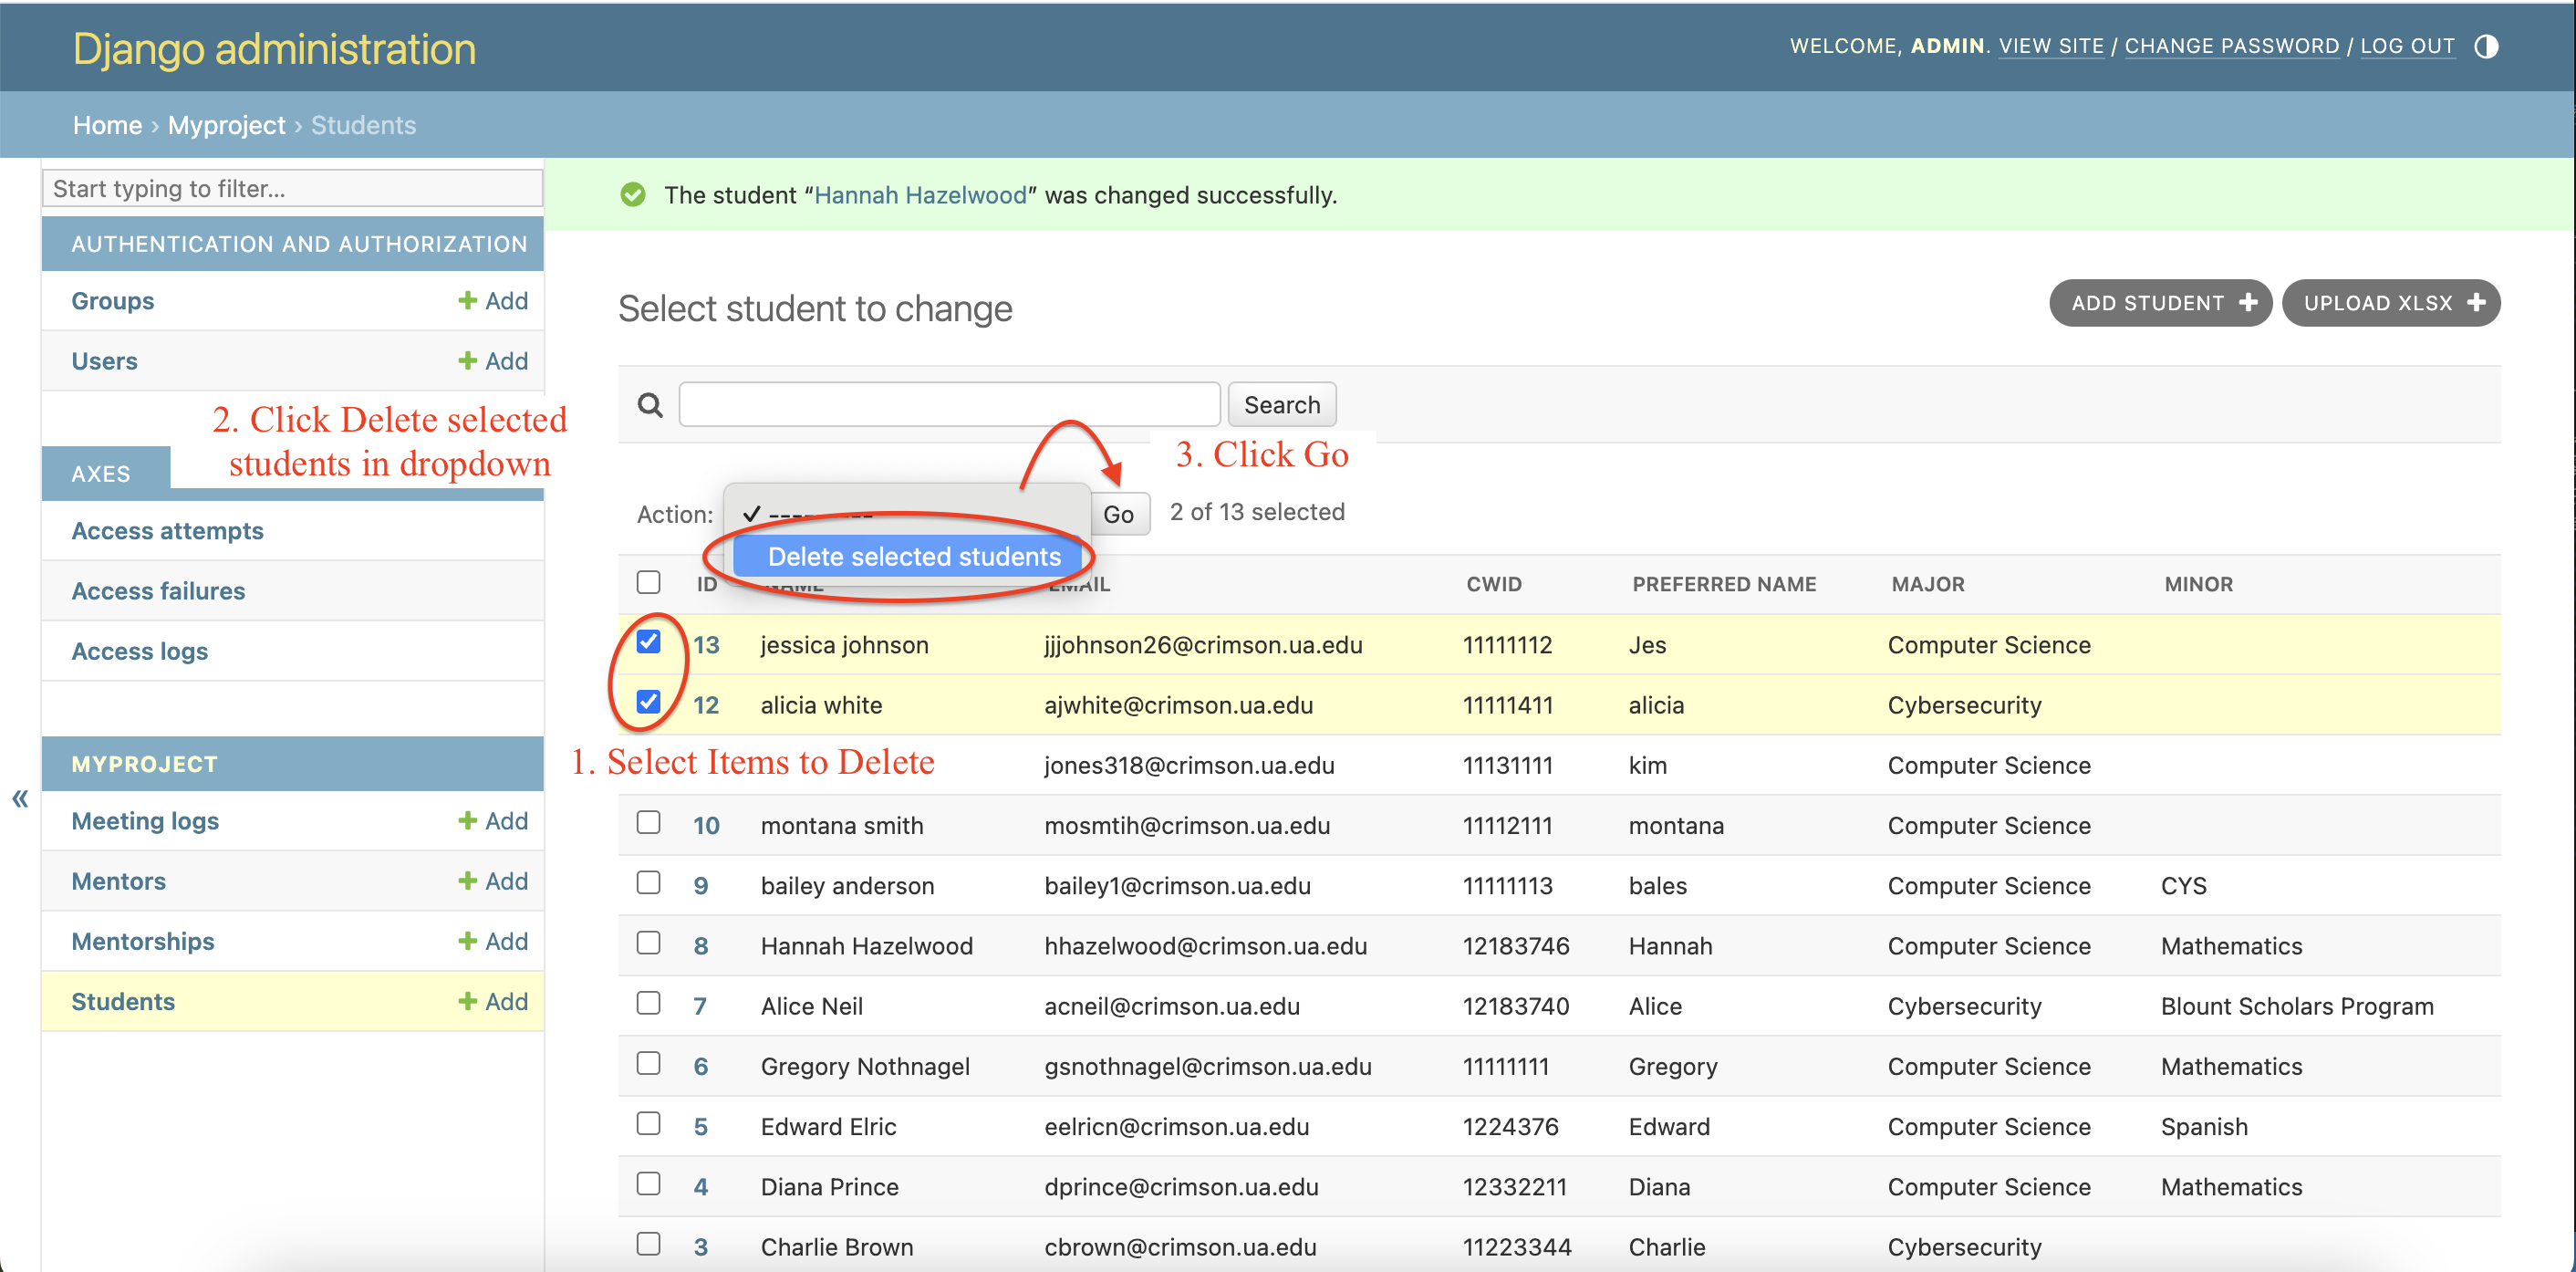
-
Navitate to the table you want to delete an entry from
-
Click on the check box to the left of an entry's ID
-
Click the dropdown below the search bar and above the table title. Select “Delete Selected {Students/Mentors/MeetingLogs/Mentorships}”
-
Click the go button
-
It will ask if you are sure and will show any other entries that will be deleted on cascade. Select yes if sure, or cancel if you no longer wish to delete.
Where:
Go to Django admin dashboard and click on upload xlsx button after clicking on the student table
Purpose:
Allow admin to batch import students from an excel file into the database. This avoids the need for manual data entry for hundreds of students.
How to Use:
-
Prepare an excel file with columns in the following order:
a. CWID
b. Last Name
c. First Name
d. Middle Name
e. Preferred Name
f. Crimson Email
g. Student Class Code
h. Assigned Mentor Full Name
i. Cohort Description
j. Degree 1 Code
k. Major
l. Concentration
m. Assigned Mentor Email
n. Assigned Mentor Office Location
o. Empty Column
p. Testing Email
q. Student Email along with Assigned Mentor Email
-
Once you have the excel file in the correct format upload the file
-
If the file format is correct, both student and mentorship tables will be populated.
Additional Considerations
If any mentor listed in the assigned mentor column (h) is not in the database, it will display an error message saying the given mentor is not in the database and will not add any students to the table. This includes if a mentors name is not spelled exactly how it is in the database.
----
It will display an error message if you attempt to upload an empty xlsx file.
----
Make sure that the Major is listed as "Computer Science" or "Cybersecurity" NOT CS or CYS
Backup Video Link (need to login to box): UA Box Backup Demo Video
Where:
This is NOT done on the website. This is done on the server that the container is currently running on in the terminal
How to Use:
This is not done in Django admin panel. Backup.sh and restore.sh are in the project root directory. To backup the current database state, just ssh into the server, navigate to that directory, and run the command “bash backup.sh” (you might have to use sudo). To restore the most recent backup, run “bash restore.sh”. To restore a specific backup from the backups/ folder in the same directory, run “bash restore.sh backup_file_name.sql”
How to Modify/Extend our Application
This page houses necessary instructions for modifying our application.
Basic Instructions:
Changes to the website can be made by changing and saving the code, then simply taking the container down (docker-compose down), then bringing it back up (docker-compose up --build). Ensure to thoroughly test any modifications/extensions.
Potential Future Changes
-
Add cohorts to student tables, or may want to add any other needed fields to tables to track more information for a student, mentor, or meeting
---
-
May want to add other primary major options in the department (currently its just a dropdown between cs and cys)
---
-
Implement a search bar in the mentorship table so you can more easily switch a student's mentor. Can add a button to upload a csv or xlsx file with the changes and it will update (currently when selecting a mentorship change you have to scroll through the options in a little dropdown which is unideal for large numbers of students)
---
-
Let students see the meetings they have had. Currently only mentors can see meetings.
---
-
Modify the profile page to let mentors upload a photo.
---
-
Add in toLowercase() functionality when saving the user session in case there are any emails that are stored in Microsoft with uppercase letters.
---
How to Modify Environmental Variables:
To modify an existing environmental variable (ex. ADMIN_PASSWORD or IP), just go to the .env file in the project root directory and change its value there
How to Create Environmental Variables:
The docker-compose.yml is the file that propagates the environmental variables from the .env file to the frontend and backend containers that get created during docker-compose up --build. So if you want to make an environmental variable specific to a single container, just list it under “environment:” for that container in the docker-compose.yml file. If you want an environmental variable that's used across multiple containers, that's when you use the .env file, and propagate the variable in docker-compose.yml (for an example, see how the “IP” variable is treated in the .env and docker-compose.yml files)
Compiler
Build the docker container by running docker-compose up --build. This will run “npm install” to build the frontend and “pip install” to build the backend.
Languages
Front-End: Node.js (Express.js)
Back-End: Python (Django Framework)
Database: PostgreSQL


Build Management
Docker is used for all build management and deployment. A completed build can be found in the docker container and volume created after running the application.
Location of Dependencies
Automated Tests?
None currently in project, see "Automated Testing" section for future testing considerations
Location of Backlog
The current project backlog can be found linked in the Sprint 3 Deliverable section of the Project Deliverables page.
It can also be downloaded with this link: Download Excel document here!
Clarity:
Code should be commented for clarity.
Routes:
Routes for new pages should be defined in separate files under the "frontend/routes" folder. Examples of structure of these files can be found in any files located in this folder.
Django File Framework:
The python Django framework uses specific files for specific purposes. For example, any code related to admin dashboard functionality should be in the "backend/myproject/admin.py" file. All urls are defined in backend/myproject/urls.py. Any parts of the database defined in the init.sql file must also be included in the "backend/myproject/models.py" file. The frontend content for any new page should be in a separate file named clearly to indicate the page it loads. These page files should be located in the "frontend/views" folder.
Front-End Styling:
Any additions or modifications to the frontend should match the styling of the rest of the website. Red should be used as the accent color to match other university products.
A Note:
In the root project directory there is a "file-structure.txt" file. This file shows the base structure of our files in the project directory. While, the current file is not up to date with the current repository, this file may provide some guidance for where files can be found in the project.
Future Opportunities for Testing
While our team did not get to add automated testing this semester, we have identified potential ways to integrate automated tests.
Django unittest library
To implement automated unit testing, future developers can use the Django unittest library with the line "import django.test as TestCase"
These tests will be located in a tests.py file in the backend/myproject folder.
More information about this library is linked in the "Miscellaneous Documentation" section on this page.
Running Tests
These unit tests can be run with the command "./manage.py test"
To automate this process, you can add this command to the entrypoint.sh file that runs during the Docker build process for the application:
echo "Running Tests..."
python manage.py test --no-input
Note that further logic would be needed in this process to handle the outcome of the tests. A potential implementation could be to cancel the build and return an error if the test cases do not pass.
Django Axes Library
https://django-axes.readthedocs.io/en/latest/4_configuration.html
Django unittest library
https://docs.djangoproject.com/en/5.2/topics/testing/overview/
Django
https://docs.djangoproject.com/en/5.2/
WSGI
FAQS
Click below to see answers to some commonly asked questions.
You need to change the init.sql file where the table is defined, edit the models.py file and edit the admin.py file. Then before rebuilding the container, you need to delete the volume and the container or else the init.sql changes will not process since the volume will think the init.sql file is already present.
You can create another admin user in django admin and assign them a group with certain permissions as well as give them individual permissions. Currently there's a single superuser, which you can change the email of in backend/entrypoint.sh. .
We recommend backing up whenever you're about to import a new batch of students. If the .csv file for the new students isn't formatted properly, things could go wrong during the upload, so it's a good idea to have the database backed up just in case. In general, whenever you're going to go in and do something as an admin, you'll probably want to backup to be safe.
Mentor cannot log in
See 'Mentor emails' subsection of additional potential issues section
During Development
Cannot log into admin panel:
Clear cache, take down volumes, don't use https://localhost, use 127.0.0.1 instead
Error submitting meeting log or profile change on frontend
If you are logged into the admin panel on port 8000, you can't edit things like student profile at the same time on port 3000 in the same browser. You have to log out of admin panel temporarily, make the changes you want, then log back into the admin panel.
User login issues
The redirect URI 'https://127.0.0.1:8000/authapp/microsoft/callback/' specified in the request does not match the redirect URIs configured for the application...
Solution: Add https://127.0.0.1:8000/authapp/microsoft/callback/ to the microsoft azure app registration's redirect URI's (see our documentation for How To Install Software -> External Resources Needed -> Microsoft Azure)
Mentor Emails
Currently, when the user (student or mentor) is logging in, in authapp.py (referring to the microsoft_callback() function in backauthapp/views.py), when the user's email is pulled to see whether they are in the database as a mentor or student, that search is case sensitive. This isn't usually a problem for student emails, but when you put mentors into the database, you have to make sure that their email has capitals where appropriate. Luckily, outlook shows the exact email as it needs to be entered into the database. So when you're putting mentors into the database, just search their name in outlook and take note of their exact email, including capitalization
Also, if a mentor has an @cs.ua.edu email, that is most likely the email that should be in the database, even if they are logging in with @ua.edu. However to be sure, searching a mentor in Outlook will show the correct email needed.
Slow Student Retrieval
In the mentor view, when you try to view all your students, you may notice that it takes a long time for them to load. That's due to inefficient database querying, which we haven't had time to rectify ourselves.
[File: frontend/views/mentor-all-students.ejs, function: displayStudentCards]
Login on Different Browsers
Login works on: Chrome
Login does not work on: Safari
While other browsers may work, we recommend using Chrome for best performance.
verify=False in authapp/views.py
This makes it so that calls to the associated endpoint don't check for a .crt file. Allows man in the middle attacks, not of the whole frontend webpage, but of specific API endpoints. For instance, if the user wants to fetch mentor details, those mentor details can be spoofed, so they see the wrong mentor info pop up on their screen.
We tried to fix this by using volumes for the .crt and .key files in the docker-compose.yml so that the files would be copied to the directories where they would be used, which we think is on the right track, but it seems more needs to be done there.
PostgreSQL Bullseye version:
In our current server, we had to modify the postgreSQL version from 13 to 13-bullseye. The bullseye version was needed to remove errors in building the application.
Other Dependencies:
Some of the dependencies and libraries used may be updated or deprecated and might cause the application to need updates to work again. Currently, the versions used are working. However, on the current server, we had to move from Node 18 to Node 16, which has been deprecated. While this is the version that works on the server, this could cause issues in the future.
Contact Me
example@gmail.com
